
According to the Indiscripts website:
"While studying bounding boxes and transformations I realized we could get nice patterns based on successive rotations applied to a given shape. As InDesign instantly determines the coordinates of the enclosing rectangle whatever the page item transform state, I had fun in drawing those boxes while varying strokes and angles. Jongware made similar experiments with its famous Spirographs script. RagingHull is just another free toy that reveals the bounds of a spinning object…"The samples in the original article all used solid colors and "Exclude Overlap" in the Pathfinder. It creates amazing patterns! But I wanted to see what would happen if I used gradients instead of solid colors.
Now, if you've ever tried to make a complex gradient in InDesign, you're probably familiar with how difficult it is. In one of my other articles, I outlined a case for creating your gradients in illustrator, rather than InDesign. Illustrator has an expandable gradient panel so it's easier to work with. Plus, you can copy and paste objects from Illustrator right into InDesign, and they will bring the gradient swatches with them.
But did you know that Illustrator already has a large selection of pre-built gradients? Go to Window > Swatch Libraries > Gradients.


I wanted all these gradients, so I made a bunch of rectangles, and applied the gradients swatches to them.

Then I copied and pasted them into InDesign, where they show up in the Swatches panel. Now you can delete that mess of rectangles.


Now you can start experimenting with all the gradients you copied over from Illustrator. I also added played with the blending modes. Note that you will get very different results, depending upon which Transparency Blend Mode you use (RGB or CMYK).
 |
| CYMK Transparency Blending Mode |
 |
| RGB Transparency Blending Mode |
Here are some of my other experimentation results.

You can different results just by changing the gradient type from Linear to Radial.
 |
| Linear Gradient, Red, White, and Blue, Lighten |
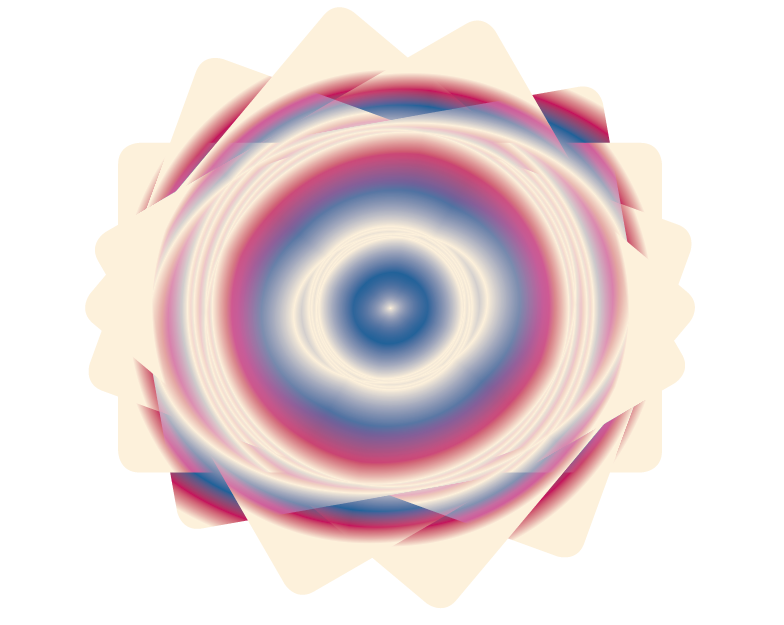 |
| Radial Gradient, Red White and Blue, Lighten |
 |
| Linear Gradient, Soft Light |
 |
| Linear Gradient, Hard Light |
 |
| Linear gradient, Color Burn |
 |
| Luminosity, Hue |
By adding a shape with a different color on top, you can create even more interesting effects.
 |
| Mixed gradient swatches and blending modes |
 |
| Radial Gradient, Lighten, With objects scooted a bit |
Sometimes the results look like a dance party.


Fancy! (Note that this will last one will take a large amount of processing power).
Now, for me, if I ever used any of these objects, I would probably just take a screen shot of the part I wanted, and use it as a design element. But however you choose to use your Indesign tie-dye designs, have fun!
