Showing posts with label Sticky Notes. Show all posts

Wednesday, October 3, 2018

MoreInfo Improves Notes, Conditional Text, Tracked Changes and More

Much of my workflow involves obscure, little understood technical features of InDesign. Two of the features I use the most are Conditional Text and Notes. They were introduced many years ago and haven’t been improved since then. However, from time to time, independent developers decide to tackle some of the challenges faced by users of these obscure features. And for these developers I am extremely grateful! In this post I’d like to introduce you to a new commercial plug-in called MoreInfo by Kerntiff Publishing Systems. MoreInfo combines the information from several features and displays it all in one handy spot. With MoreInfo, you can see, well, more info, on conditional text, notes, tracked changes, overset text, and index entries.

MoreInfo Panel

Read the entire article at InDesign Secrets.

Tuesday, September 26, 2017

Help Make Adobe Products Better with UserVoice!

Recently, Adobe has totally changed the way it handles feature requests and bug reports. They used to seemingly go into a black hole at Adobe, never to be be spoken of again. Even on the pre-release forums they were difficult to find. The engineers would say that few people gave them feedback, and the users who did provide feedback complained that Adobe was ignoring them.

But good news! Adobe has now made the feature requests and bug reports open to the public! You can easily search through other people's feature requests, add comments, and VOTE!

Here is an example of a feature request. Notice that there is a comment from one of the Adobe engineers, who has assigned a status to the feature. Notice that there are also 13 comments, and 18 votes. Once you vote for a feature request, you are given the option to subscribe to the topic and be notified whenever there is a new comment on the topic.


So I've compiled links to the feature requests of my favorite InDesign features (which I personally think are extremely neglected). Would you please take a few moments and VOTE for this features?

I will update this list as I see more features that I'm really passionate about.


InDesign Notes

InDesign Conditional Text

Acrobat Commenting


I love how Adobe is proactively seeking our feedback, and is providing a useful platform to do so. It is my understanding the David Blatner and Anne-Marie Concepcion (from InDesign Secrets) pioneered the idea of using User Voice for InDesign feature requests.

Please consider visiting the InDesign UserVoice site where you become an active part of making InDesign better. You can also visit the Acrobat UserVoice site here.


Edit: 9-13-918
If you need an easier way to create and manage annotations in your PDFs, check out my article on Bluebeam Revu. It's an amazing program designed specifically to meet the needs of users in Architecture, Engineering, and Construction. Specifically, read about the Toolchest, where you can store annotations that you use frequently. Revu has done an amazing job of listening to their users and building a tool to meet their needs.

Thursday, June 8, 2017

Show the InDesign Notes Tool Some Love

In my workflow, I use notes every day, at least a few dozen times per day. I fill my InDesign documents with notes for my clients, asking questions, for more information, photos, or to clarify things. I use Notes so frequently that I even created a custom keyboard shortcut for "Convert to Note."


My notes are my primary way of communicating with my clients, in context in the PDF drafts that I send them. But you may be wondering how InDesign Notes translate into PDF notes. There are two ways this can be accomplished:

Read the entire article at InDesign Secrets.


Thursday, August 18, 2016

Are Your Sticky Note Icons Too Small? Make them Bigger!

Though I've grown to like Acrobat DC, one of my ongoing complaints about it is that it is too difficult to see which annotations are selected. Take a look at the following examples:

Acrobat 9
Acrobat XI
Acrobat DC
Notice how the sticky notes in both Acrobat 9 and XI had nice thick blue borders around them. But notice how delicate and thin the border is on the sticky note in Acrobat DC. While I realize that the Acrobat UI designers probably wanted to make the sticky notes less obtrusive, now they can be quite difficult to see. If I have multiple sticky notes on a very complex page, it's easy for those tiny little blue lines to get lost.

Also, something that is not apparent in these little screenshots is that in Acrobat 9 and XI, the blue lines around the sticky notes were actually marching ants. They had a very subtle blink to them, while the blue line around the DC icon does not blink at all, making it even more difficult to locate the sticky note on the page.

I recently stumbled across an older thread on the Acrobat forums that discussed how to increase the size of sticky notes. AND IT IS GOLD!

The first sticky note on the left is a normal sized sticky note. If you keep running the script, you keep increasing the size of your sticky notes. Now you can easily see it on the page!


This scripting goodness is courtesy of Try67, Acrobat scripter extraordinaire.
Select your sticky note, open the JS console (Ctrl+J), enter this code, select it and press Ctrl+Enter:
var r = selectedAnnots[0].rect;
r[2] += r[2]-r[0];
r[3] += r[3]-r[1];
selectedAnnots[0].setProps({rect: r})
This script works in Acrobat X, XI, and DC.

Edit 8-19-16: Try67 recently adapted this script to also work on text annotations, such as cross-outs and underlines. It is available for sale for $50. Check it out!

Tuesday, June 17, 2014

My Wish List for Notes - Across the Suite

I am a huge fan of PDF Commenting. I love notes for a variety of reasons:
  • For collaboration with editors
  • To help me quickly locate non-searchable text (scanned text, or text in images)
  • To give instructions to printers
  • To keep myself organized
  • For color coding systems and different types of information
  • PDF commenting forces others to organizes their thoughts into something cohesive right on the page (as opposed to emailing general gibberish)
This article is a follow-up to one of my previous articles: My Wish List for Notes in Adobe InDesign.

InDesign

  • I wish that like in Photoshop or Acrobat, a note could reside independent of a text flow.
  • I wish that I could natively apply notes to objects and they would appear in the Notes panel. (Notes can be applied to objects via the ObjectNotes script, but they can only be navigated to using the NoteNavigator Script.)
  • I wish that notes from InDesign could export to PDF automatically, to either Print PDF or Interactive PDF. (You can include InDesign Notes when exporting to PDF using PDF Stickies.)
  • I wish that I could choose different note colors and icons, right within InDesign.
  • I wish that my username and date would appear as the author of the note within Acrobat (just as they already do for InCopy.)
  • I wish I could automatically import notes back into my InDesign document, from the corresponding Acrobat document. (This functionality is available using DTP Tools Annotations.) I also want the replies to come along with it.
  • I wish that I could import text highlights into InDesign, as non-printing objects, sort of like invisible characters, that they would only appear in Normal Mode, and not in Preview mode. (This functionality is available using DTP Tools Annotations.)
Many of my ideas for InDesign notes can be incorporated right into the existing Notes panel.

Photoshop

  • I wish that I could specify my username, and choose icons, colors, etc.
  • I wish that drawing markups would import.
  • 6-2-17: I wish that Photoshop would change how it handles notes. Formerly, it imported them, now it says they will be ignored, but in certain circumstance, it actually DELETES them!

Illustrator

  • I wish that Illustrator could make notes. Or read notes. Or do anything at all with notes.

In Acrobat

  • I wish that that when I have along list of comments, that the scroll wheel would scroll down through the list, but I have to instead use the scroll bar to scroll down.
  • I wish that Sort Comments by Color would be restored as a feature (it was removed in Acrobat X). This was added to Acrobat DC in 2016!

  • I wish for the return of the amazing comment toolbar in Acrobat 9. While I can undock the Comments Pane in Acrobat XI, all the handy tools are missing and I cannot dock the Comments pane to the bottom of my document. 
The Acrobat 9 Comments Pane has lots of many tools

The Acrobat XI Comments Pane (even when undocked) has just a couple difficult-to-use sorting methods, and is missing all the handy tools
Is there anything you would like to see in commenting throughout the suite? Leave your comments below.

Like this article? You may also be interested in: My Wish List for Notes in Adobe InDesign.

Edit: 9-13-918
If you need an easier way to create and manage annotations in your PDFs, check out my article on Bluebeam Revu. It's an amazing program designed specifically to meet the needs of users in Architecture, Engineering, and Construction. Specifically, read about the Toolchest, where you can store annotations that you use frequently. Revu has done an amazing job of listening to their users and building a tool to meet their needs.

Thursday, May 15, 2014

How to Globally Change Font Size of Text in a PDF Sticky Note

Recently I got a message from someone wanting help with enlarging the text in a PDF sticky note. He referenced this article: How to Edit Font Properties Within a PDF Sticky Note 
"My font in my PDF sticky notes changed when I had some trouble saving the document. It is very small; I can bearly see it. I did what you said but it just works for one note. I have documents with more than 1000 notes and I was wondering if there is some way to change them all at once."

Setting Default Commenting Preferences

Note that the default preferences for PDF sticky notes in Acrobat are set in Preferences > Commenting.


Changing Font Size in a Sticky Note

But in the case of my reader, his sticky note font size had somehow changed later on, and he needed to globally change the size of the font. Now, there is a way to change sticky note font size in Acrobat, but as he discovered, it only works one sticky note at a time. First go to View > Properties > Toolbar Items > Properties Bar (or press Ctrl/Cmd + E).

How to Show Properties
Sticky Note Properties

Now, you may be confused because the Properties Bar doesn't show anything about changing font size. But it's contextual. Click inside your text, and then you'll be able to change the font size.

Pop-Up Text Properties

Changing the Properties of Multiple Comments at Once

There is also a way to change the properties of many sticky notes at once, but sadly, font size is excluded from this. First, select your comments on the Comments pane. Then right click > Properties.


You'll get two tabs here: Appearance and General. While there are many useful things you can change here, font type and size are not among them. Font size, color, and typeface are in the Pop-up Text Properties (as opposed to Sticky Note Properties).


So if we can't globally change sticky note font size in Acrobat, where can we? Your text editor of choice. I like TextWrangler.


The trick is that we need to export the comments out as a separate file and work with them alone. I wrote an article about this idea on Creative Pro: Working With FDFs: Forms Data Files. Take a moment, go read that article and then come back.

Editing the Font Properties in TextWrangler

So now that you know what an FDF file is, export you comments and open them up in TextWrangler. Do a search for some text in one of your comments. Alternatively, you could search for the bit of code: "font-size:" Even though the default point size in Acrobat (according to the Preferences > Commenting) is 12 point, for some reason here in TextWrangler, it's listed as 14 point. Not sure why...


Anyhow, change your point size from the small number to your desired larger number. I changed mine from 10.5 to 14. Now, my example just had two comments, but yours may have more. If you want to be extra sure you're not inadvertently changing the wrong thing, make you find and replace query a bit longer and more specific, like so:


Now save the file and go back to Acrobat.

Meanwhile, back in Acrobat…

In the Comments Pane, select all your Sticky Notes. Now take a deep breath and hit Delete. Now all you have to do is double click your FDF file and Acrobat will import all those comments, like magic! You don't even have to tell it what PDF it's supposed to go with. Neat, huh?

The cool thing about this is that Acrobat has a built-in limitation of around 20 points for maximum font size. But by editing the text size in TextWrangler, you can get around this limitation and make the text as big (or as small) as you'd like.

Now the text is no longer small


Edit 9-28-16
You may be interested in a great script that actually enlarges the sticky note icon. I discuss that here: Are Your Sticky Note Icons Too Small? Make them Bigger! 


Thursday, April 24, 2014

An Easier Way to Do an 11x17 Foldout Page

Lately, I've been working on training manuals. The manuals are printed on standard 8.x5 x 11" paper, 3-hole drilled, and placed into a binder. But sometimes, there is an 11x17 foldout page. While InDesign allows for mixed page sizes in a single document, it gets complicated (easily messed up) when the content of all the pages flows together in one story. I've come up with a fairly fool proof solution to this problem. It involves creates the entire document as 8.5 x 11 and using Acrobat to attach the 11x17 file.

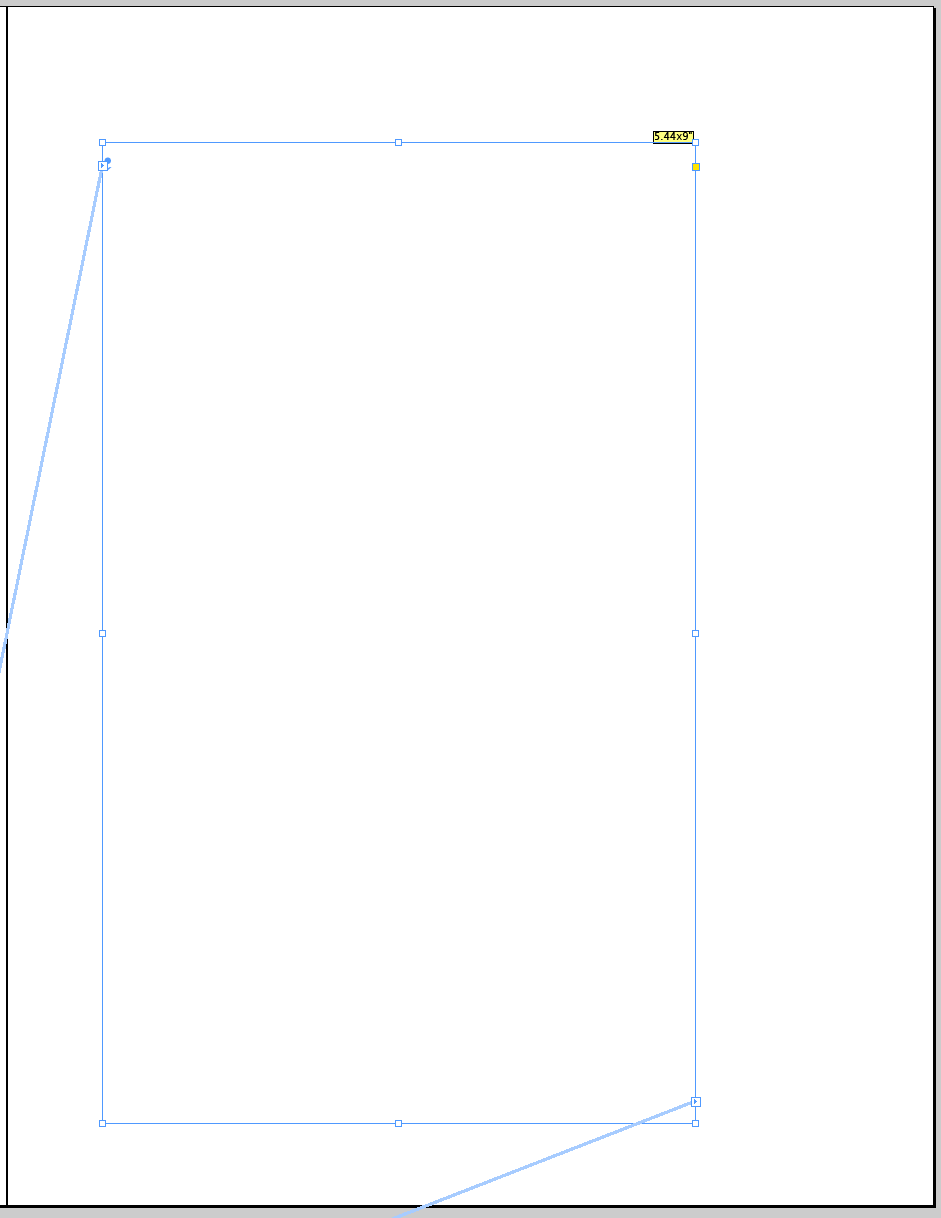
1. Make a empty page in your InDesign document. It should be part of the threaded story.


Empty Page with a threaded frame


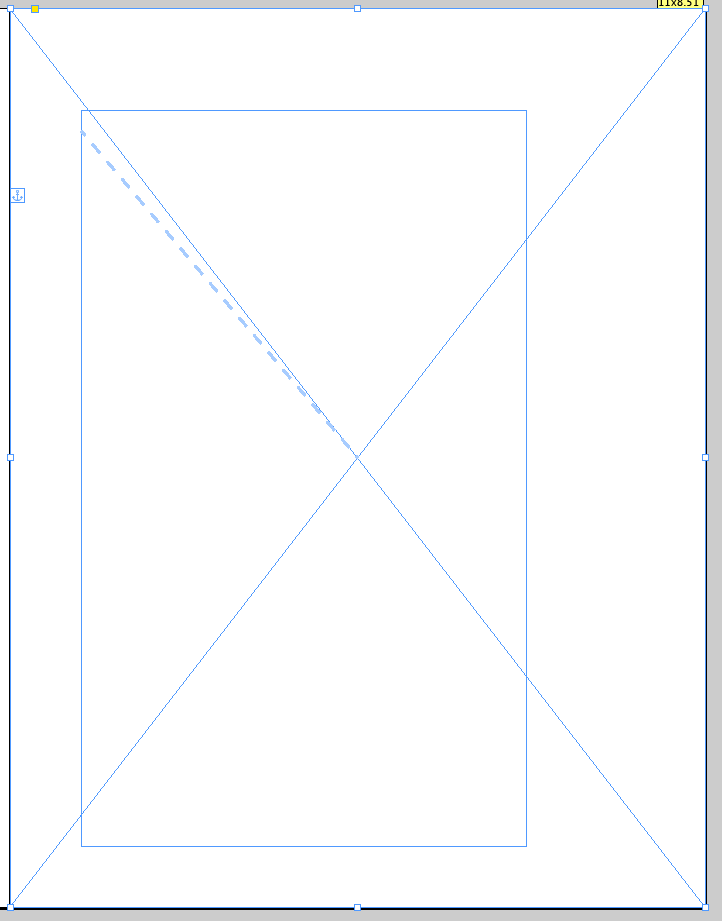
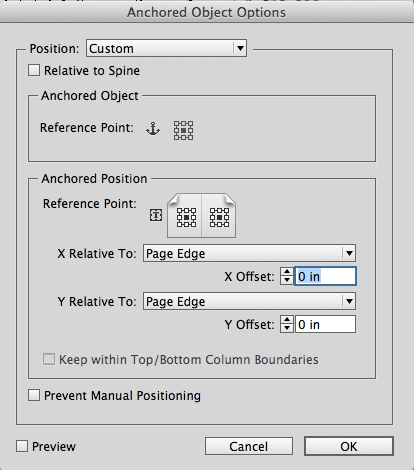
2. Create an 8.5 x 11 graphic frame and make it anchored into this empty frame. Set the Anchored Object settings according to the graphic below.


Graphic Frame Anchored into the Text Frame
Anchored Object Settings for a full page centered graphic

3. Place the 11x17 foldout page as a graphic into the graphic frame you just made.


4. Add a big yellow text frame indicating what this page is for.

Be sure to anchor this text frame into the same place as you anchored the graphic frame. You may need to scoot the graphic frame out of the way for a moment in order to anchor the yellow frame.


5. I also like to add an InDesign Note indicating what is supposed to happen with this page.

I use a plugin called PDF Stickies. It converts my InDesign Notes into PDF sticky notes. I wrote an article about how to use that plugin here. The important thing to do here is to type in the filename of the 11x17 foldout graphic that needs to go here in the final printed piece.


6. Add a blank page after the one you've just made.

Then, using the story editor, copy and paste the contents from the right facing page to the left facing blank page you just added.


7. Change the text to indicate that this is the backside of the 11x17 page. 

This serves to keep your page numbering correct upon final output.


8. Export the PDF.

Note: in order to get the PDF Stickies plugin to export the stickies to a Print PDF, you need to add the InDesign document to a book and then export from there.

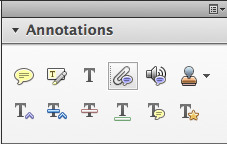
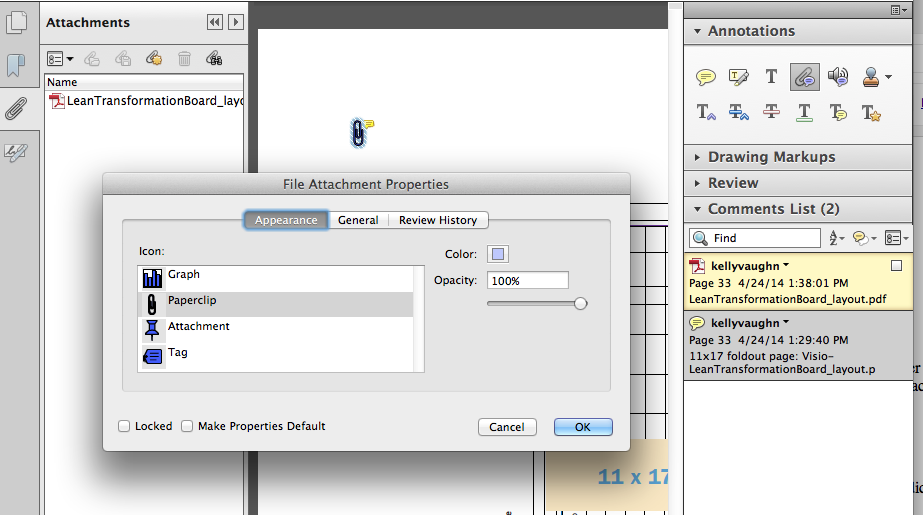
9. Open the file in Acrobat and go to the Comments pane. Also open up the Annotations twirl down.


10. In the Comments List, you'll find the name of the 11x17 graphic that the printer will be printing full size and inserting here. Copy that filename.


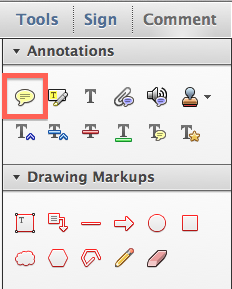
11. In the Annotations twirl down, click on the little paperclip icon.


Attach File

12. When Acrobat asks you what file to attach, paste the filename you just copied into the search field.


See how it attached the file and made a comment all in one fell swoop?

Attachment Comment in Acrobat

13.  Now you can delete the yellow sticky note comment in the Comments List.


12. Be sure to tell your printer about the 11x17 foldout page and let him know that the page location is referenced in the Comments List, and the 11x17 file to print is in the attachments pane.

Thursday, March 27, 2014

My Wish List for Notes in Adobe InDesign

This is a post for the Adobe InDesign team, or for any InDesign developer who would like to tackle this project.

I would like to see Notes move seamlessly between Adobe products:
There are two  plugins that address the issue of Notes in InDesign.

The missing link is a solution that will let me export all sorts of annotations to Acrobat in one fell swoop. The reason is because I create technical documents and I often need to get clarification about certain bits of text in a long threaded text frame. I would like a way to tag that text right in InDesign and have that tag appear as a PDF annotation.

I’d like a way to repurpose the XML tagging capabilities of InDesign to allow me to create PDF annotations. Here is how I envision the annotated text to look in the Story Editor.

Story Editor display, with annotated text markup displayed

Here is what I envision the capabilities of the new and improved Notes panel:
  • Blocks of text can be marked for PDF annotation, right in InDesign
  • We should be able to choose annotation type, icon, and color in the InDesign Notes panel (preferably without having to open a second dialog box to do so.
  • A note navigator that lists all the notes at the bottom of the Notes Panel, under a new twirl down.
  • These annotations would be capable of appearing in both Print and Interactive PDFs
Here is an illustration demonstrating what I would like to see the UI look like. The Notes panel will have three new drop downs on the top right: Annotation Type, Icon, and Color. At the bottom of the panel will be a twirl down listing all the notes in the document.

New and Improved Notes Panel

New Drop Downs in the Notes Panel
If you enjoyed this article and would like to learn more about how notes can make your publishing workflow more efficient, join me at PePcon 2014, where I will be speaking on PDF Annotations.

Like this article? You may also be interested in: My Wish List for Notes - Across the Suite.

Tuesday, October 16, 2012

Adobe Reader XI for Knitters

In my knitting bag, you'll find several mangled, folded up, scribbled-on patterns. To keep track of where I'm at in a pattern, I used to use paper sticky notes. I like the light yellow ones, because the paper is thin enough for me to be able to slightly see what is underneath it. Yet, because they are adhesive, I can easily more the sticky note after each row, keeping track of my progress.

If you are a knitter with a tablet or laptop, I'd like to introduce you to a different, perhaps easier way to keep track of your place in your pattern. With the recent release of Adobe Reader XI, knitters now have a great resource for their tool bag. This tutorial will use a charted color pattern, but this technique will just as easily work with a charted lace pattern. First, you'll need a PDF of your pattern.

Open the PDF in Adobe Reader. There are two options for opening files in Reader: Opening from your local hard drive and opening from an online account.


The first option is to open a file on your local hard drive...which is pretty self-explanatory. It's just a PDF located on your computer.

The second is opening a file from an online account, such as Acrobat.com. (Side note: The drop down for Open from Online Account is not exactly clear. I think that Open from Online Account should be outside of the drop down (like Show); it should not be the first item the the drop down. Regardless, if you are opening a file from your local hard drive, you can ignore this confusing drop down menu.)

However, storing your patterns on an online service such as Acrobat.com may be a good solution for you if you don't want to carry hardcopy patterns, have a tendency to lose papers, or need to have access to your pattern on multiple devices.

Once your pattern is open, click on the Comment pane. If you are used to used paper sticky notes, your first inclination may be use the Sticky Note tool to track your progress in your charted pattern. Let's explore why this isn't the best tool for the job.


When you first click on the page with the sticky note tool, two things happen simultaneously: 1) A sticky note icon placed on the page. 2) Near the sticky note icon is a light yellow pop-up where you can type notes. The pop-up note will by default line up on the edge of the document. So if you zoom in and out, the location of the pop-up note will not stay constant relative to your pattern. It will always align to the side of your page.


Now you can choose a different color, icon, and opacity for your sticky note. This can be useful if you need to increase or decrease contrast between your sticky note and the page's content. You can easily type notes to yourself in typing area of the sticky note.


You can also move the pop-up note separately from the actual sticky note itself. However, the size of the sticky note and icon remain relatively constant on the page, no matter if you're zoomed in to 800% or zoomed out to 50%. This means that the size of the sticky note and placement of the pop-up are completely independent of the zoom level. So you can't count on them to visually stay where you put them.

What neat about sticky notes (and all other comments for that matter) is that you can change their color and opacity. Right-click on the sticky note and choose "Properties." There are a whole host of icon and color choices.


While sticky notes are great for other uses, in order to more easily track my progress in a charted pattern, I prefer to use a different tool. I like the Rectangle tool.


To make a rectangle, click on the rectangle tool and draw a rectangle on your page. The default rectangle is has a red stroke and no fill. But we can easily change this.


Right click on the rectangle and choose Properties (or press Cmd/Ctrl + I).


Here you can change the stroke and fill colors, as well as the opacity.


You may need to experiment with your Rectangle properties in order to find what works best for your pattern. See how my yellow rectangle has low contrast against my pattern?


By changing the color and opacity, now we have a sticky note that has a higher contrast between the different colors in the pattern.


The beauty of the rectangle tool is that the size of the rectangle stays constant relative to the zoom level. So when viewing the page at 400%, the rectangle will be four times larger than when viewing the page at 100%. Basically this means that the rectangle will stay where you put it, and remain correctly sized and proportioned.

100% Zoom

400% Zoom

In previous versions on Reader, users only had access to the Sticky Note Tool, not any Drawing Markup tools. But with the release of Reader XI, users can "comment" on any PDF you want (barring any security settings that the publishers may have imposed). Better still, you can Save the PDF, and your "comments" will still be there in the exact same place the next time you open the PDF.

Edit: 9-13-918
If you regularly use PDF annotations, check out my article on Bluebeam Revu. It's an amazing program designed specifically to meet the needs of users in Architecture, Engineering, and Construction.

Thursday, October 28, 2010

How to Extract Text From Locked Comments within an Acrobat Shared Review

Each quarter, I do a newsletter that has two versions: English and Spanish. After the English layout is done, I send the PDF to my client, who then translates the document into Spanish. I don't speak Spanish, so I needed a way to get the Spanish content into the right place without inadvertently copying and pasting back into the wrong spot in my InDesign document. With Acrobat commenting, I can copy and paste right from the Comments tab into the corresponding text of the InDesign document. We've used PDF commenting with great success, in order to avoid emailing large files back and forth. I recently decided to give Acrobat Shared Reviews a try. It enables us to avoid emailing the proofs, and also allows for multiple people to comment and we can all see their comments.

However, I discovered that using Acrobat shared reviews, I can no longer copy and paste text from the Comments tab in Acrobat. See how one of the comments has a little lock symbol next to it? That comment is from my client, and the text is seemingly inaccessible to me.


After several frustrating experiments with exporting comments and then reimporting them into a non-tracked document (with marginal success), I discovered that I simply open the pop up note, I can copy the text from there. Sweet! Another PDF challenged solved!