Showing posts with label PatternMaker. Show all posts

Monday, July 6, 2015

How to Make Checkerboard Gingham in InDesign Using PatternMaker Lines

Recently, I noticed a book on my bookshelf that had some interesting patterns on the front.  Today, for some reason, I was struck by the pattern in the lower left. It has such clean geometry, and is so attractive, that I decided to try and create it using Teacup PatternMaker.


I was able to create it using just four objects: all using the Lines pattern. The first object was the tiny squares. By creating dashed lines that have the same stroke weight, dash length, and gap length, but double the Line Distance, you get squares!

First set of squares


So to get the checkerboard, select the frame, then copy, paste in place, and scoot over a bit. My stroke weight was set to 6 pt, and my cursor key nudge (in Preferences) was set to 1pt, so I just had to nudge it over 6 pts and up 6 points and it lined up to make a perfect little checkerboard.

Second set of squares

Next, copy and paste in place, changing the color to blue to make it easier to line up. Change the line distance to 60 pt, and the stroke weight, dash length, and gap length to 30 pt. I chose 30 points because I needed a 5x5 set of tiny squares (6 pts each) to fit perfectly inside one of these larger squares.
Third set of squares
Now, copy and paste in place again, changing the color to see what you're doing and scooting into place.

Now, change the blue square to pink and the yellow squares to white. Voila! Checkerboard Gingham!


Like this? Check out some of my related articles:
How to Make a Gingham Pattern in InDesign
Quick! I need some 1950s style floor tiles in my design!
How to Make Lumberjack Plaid
 Making a Checkerboard Pattern With Nested Styles 

Sunday, February 22, 2015

Using PatternMaker Lines to Recreate Striped Knitted Fabric

I have a beautiful striped blue dress that I love to wear in the spring and summer. It's knitted fabric, which makes it stretchy and comfortable. But it's also a rather thick fabric (due to the knitting technique used). It doesn't wrinkle and it's very flattering. I recently took a closer look at the fabric to see if I could determine how it was made and if I could recreate the look of the fabric in InDesign using Teacup PatternMaker.
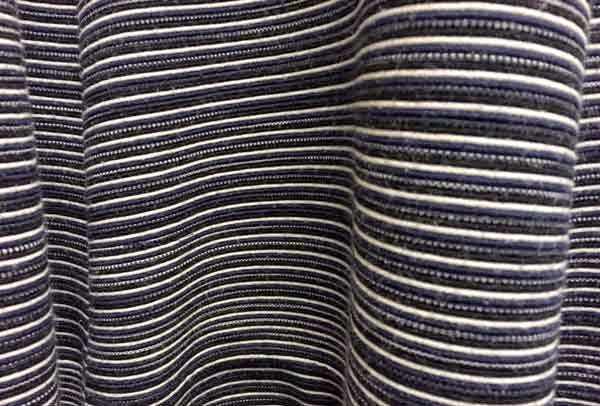
Blue Dress Fabric
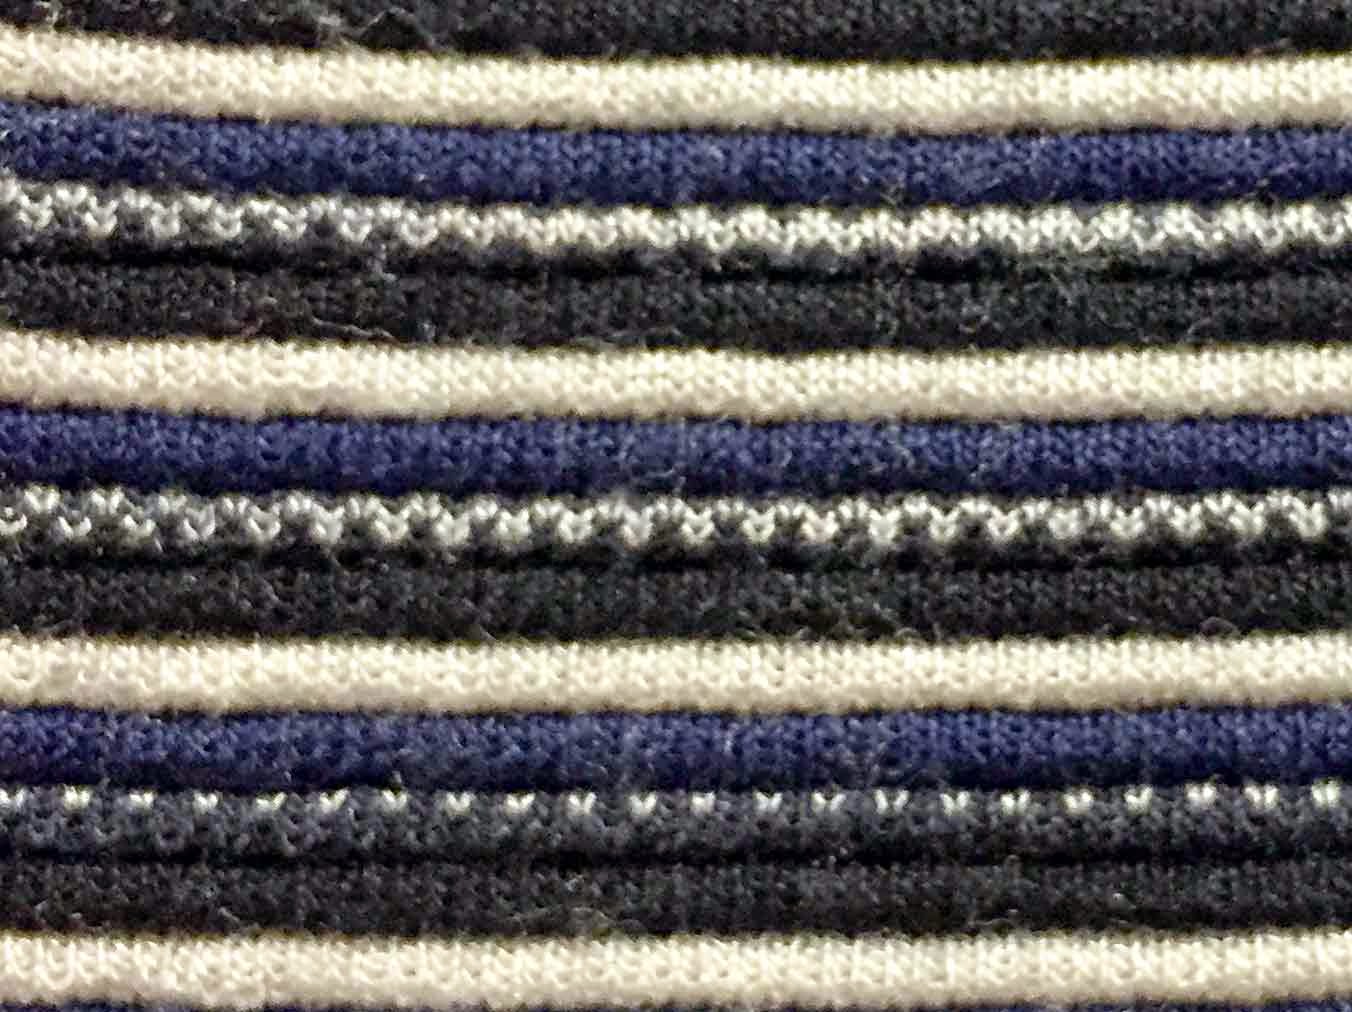
Blue Dress Fabric: Close Up
The first thing I noticed about the fabric was that was knitted in stripes:
1. White
2. Black
3. Two-tone: Black and White
4. Blue

The second thing I noticed about the fabric was that it was jacquard knitting.  Jacquard knitting is a complex type of multi-color knitting whereby the floats created by the color switches will be confined to the inside of the finished project. What that means to the person wearing the fabric is that the interior of the fabric doesn't snag when you wear or wash it. You'll see this technique used in those fancy knitted ski sweaters that cost a couple hundred dollars each. The cheap sweaters don't employ this technique because it's more complicated to produce. That's not going to affect how I recreate the pattern using PatternMaker; I just thought it was something interesting to note.

The third thing I noticed about the fabric was that it was pin tucked, resting in subtle horizontal ridges along the width of the fabric. It makes each stripe puff up a little bit, so that even if the fabric was all in a single color, subtle horizontal ridges would still exist.

Believe it or not, we can create this pattern using only 5 objects! So let's recreate this pattern using PatternMaker!

1. Make a large rectangle and fill it with black lines using the following settings.
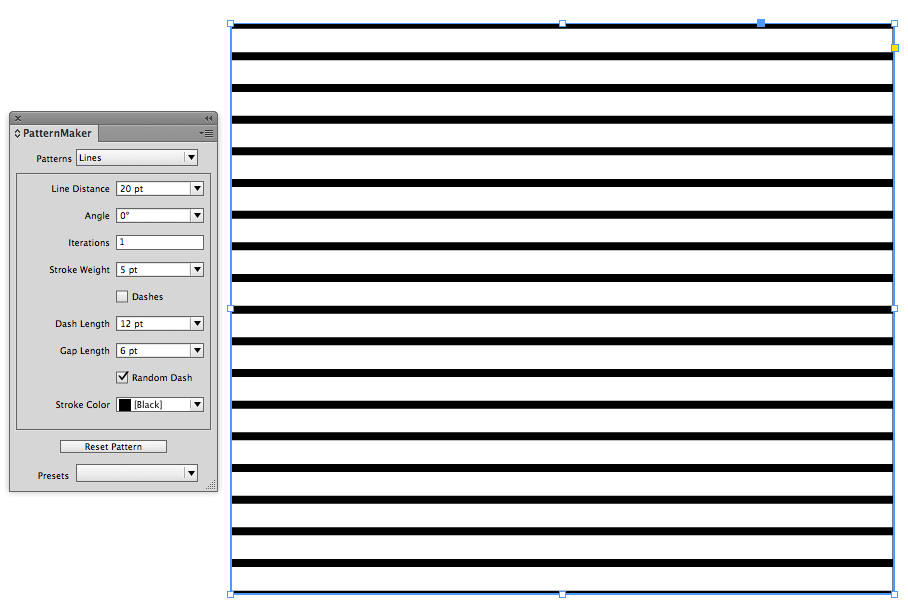
Black PatternMaker Lines
2. Set your ruler increments to Points. Now, keep in mind that the units used in PatternMaker are the same as whatever unit of measurement you have for the current document you're working in. I find PatternMaker much easier to use if I am working in points. To quickly change your unit of measurement, Ctrl+Click in the top left corner of you ruler guides. Then choose Points.


3. Change your Cursor Key preference to 1 pt. Since we'll be reusing (and nudging) the black lines for the rest of the design, it's important to set the cursor key preference so that when we nudge, we'll get the exact alignment of the lines.
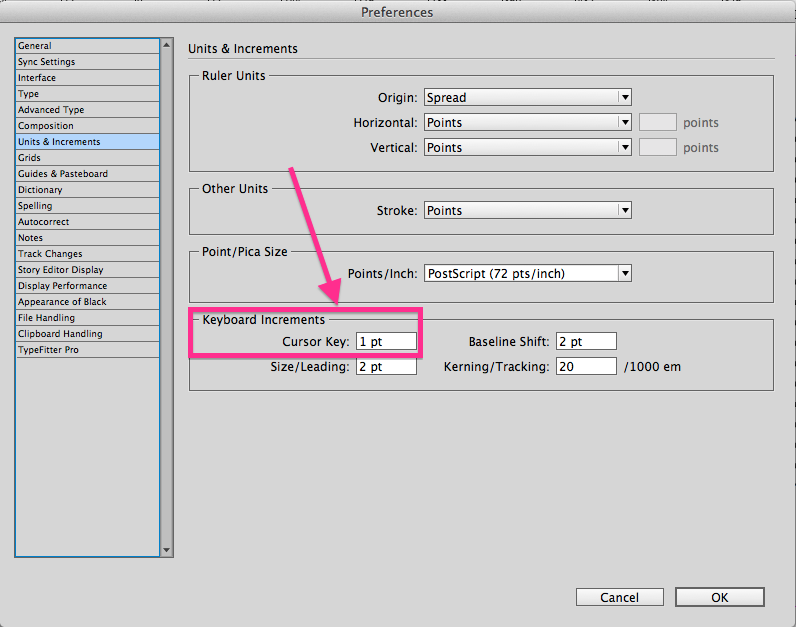
Change Cursor Key Preference
4. Add the Blue Lines: Select the Black Lines, then copy and paste in place. In PatternMaker, change the Pattern Stroke color to blue and then Shift+Up Arrow once. This will move the blue lines up 10 points. Because the line distance is exactly 20 points, that will put the blue lines exactly halfway in between the black lines.
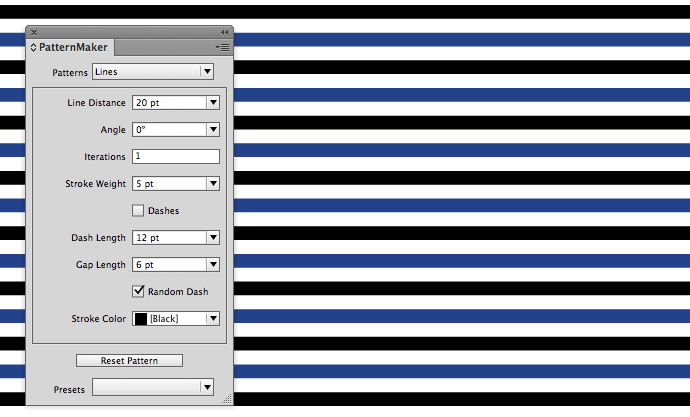
Black and Blue Lines
5. Add the White Line Placeholder: Since you already have the black lines pattern on your clipboard, simply Paste in Place again. Change the Pattern stroke color to magenta so you can see the pattern while you're aligning it. Press the up arrow five times.
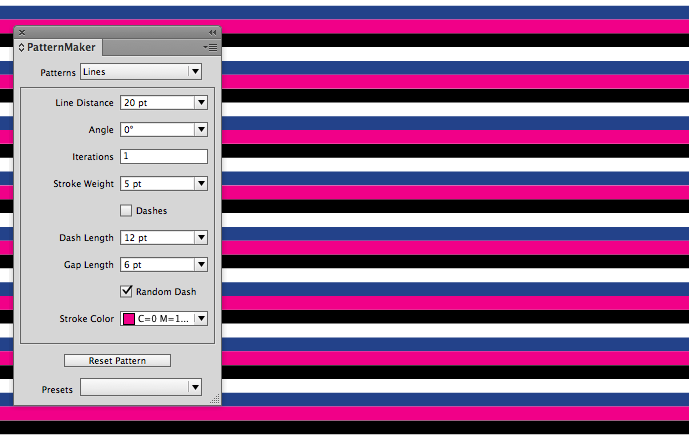
Use Magenta to Align the Lines
6. Duplicate the Magenta lines. Copy the magenta lines and and Paste in Place. Then Shift + Up Arrow once. These lines will be the placeholder for the white background two-tone lines we'll be creating next.
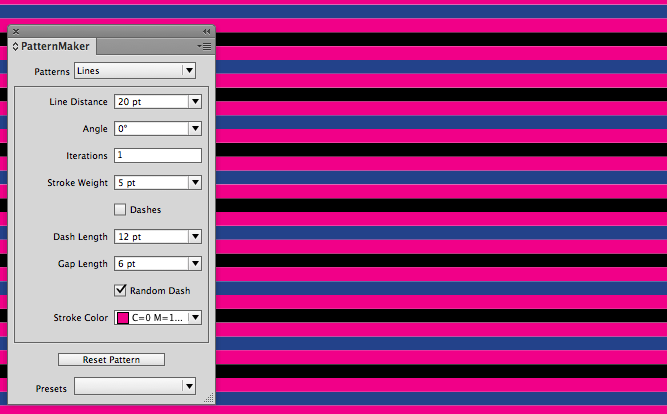
Duplicate the Magenta Lines
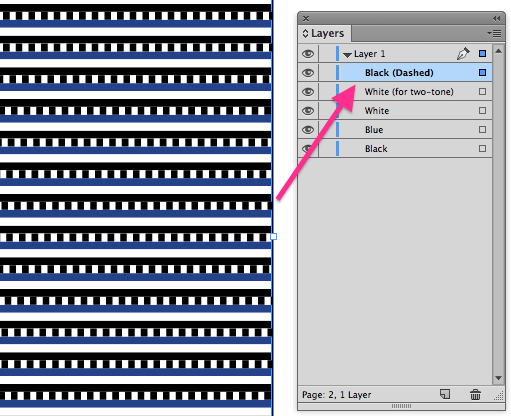
7. Rename your layers. If you look in the Layers panel, you'll see something similar to this. Those names come from how PatternMaker works. For every pattern you make, PatternMaker creates and embeds an EPS file into your InDesign document. Those embedded EPS filenames are what then get displayed in the Layers panel. But when all your patterns are created using the same type of shape (Lines, Triangles, Crosses, Dots, Waves, etc.), the names in the Layers panel aren't very helpful.
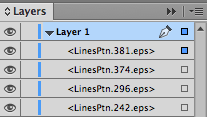
Auto-Generated Confusing Layer Names
So to make it easier to use the Layers panel to select the different frames, change the names in the Layers panel according to your colors, like so:
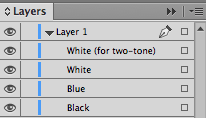
Understandable Layer Names
To change the names of your layers, click on the layer name, pause, then click again (a slow double click). The name will then highlight in blue and become and editable text field.

8. Change the magenta to white: In the Layers panel, Shift + Click on the little squares next to the two White layers. Then change the pattern stroke color to white.
9. Make the dashed line for the two tone. Select the top white lines pattern, then copy and paste in place. Change the line color to black and choose Dashes, Random Dashes, 4 pt Dash length and 4 pt Gap Length. The Random Dash is important because without it, the pattern will look like it has vertical stripes in it. Be sure to change the name of the layer in the Layers panel.
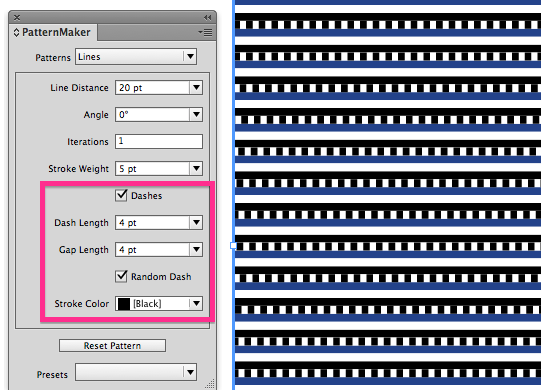
Dashed Line for two-tone stripe
Be Sure to Change to Layer Name
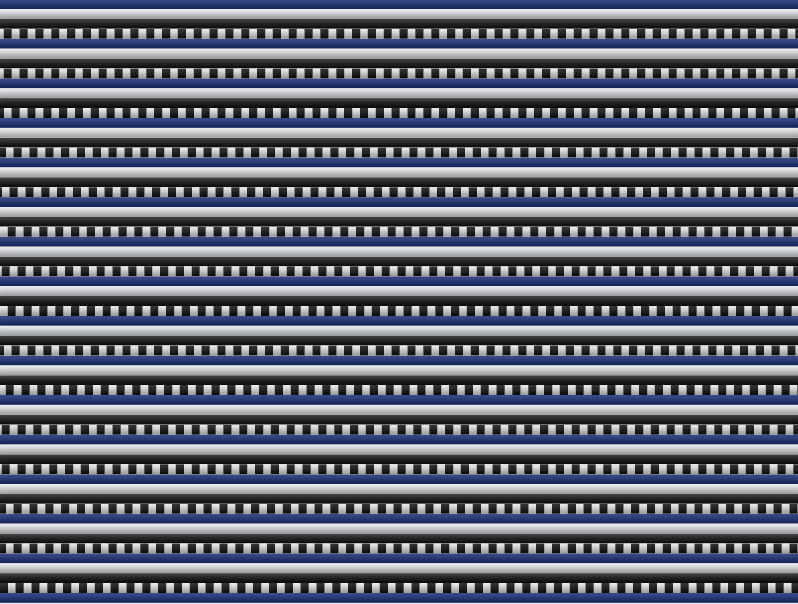
10. Add bevel and emboss to simulate the pintuck. Use the the settings below.
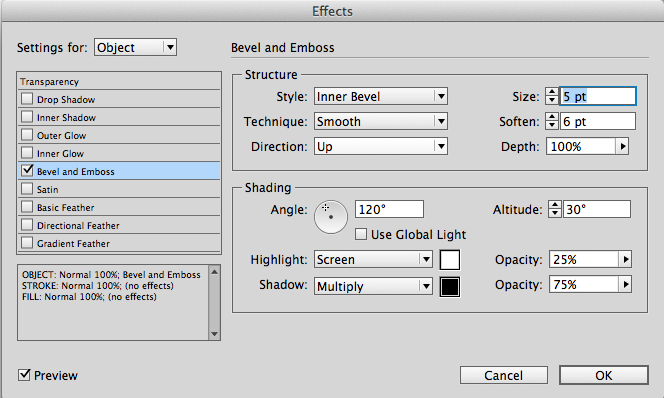
Bevel and Emboss Settings for Pintuck
Completed Blue Dress Fabric Pattern

Blue Dress Fabric
While this recreation is not an exact replicate of the original blue dress fabric, it is an interesting study in what can be done with PatternMaker and just a few objects. PatternMaker is a free download and come with 3 free patterns: Crosses, Lines, and Scallops. An additional pattern pack can be purchased as a subscription for $49/year.

Saturday, April 20, 2013

Use PatternMaker to Design a Geometric Color Block Pattern

In a post a couple of years ago, I explained how to design a pattern in InDesign that mimicked an afghan I have made. That method used tables and some creative cell-merging.


But this evening I figured out how to create this same pattern using PatternMaker.

The original design was based on knitted garter stitch, which incidentally is my favorite type of knitting. I have details of the afghan construction here.

So, to keep it simple, I'll be using points as my measurement of choice for this pattern. That'll let me easily use the same increments as I did in my original post (8, 5, 5, 5, 8), for square that is 33 x 33.


Start with a square 165 pt x 165 pt and fill it with the "Weave" pattern. (I chose 165 because each square will be 33x33. And 33 x 5 = 165).


Change the Line Color (not to be confused with the Endline Color).


Next, change the Number of Lines to 2 and the Angle to 0.


Since the original design was based on a 33 stitches of knitting, we want to match those proportions. So change the Weave size to 33. See how the set of 5x5 squares line up perfectly inside the frame now?


Now, increase the Line Weight to 5.


My original squares were just stripes (no black borders on the sides). In the final afghan, they just appeared to have black vertical bars because the squares were joined together at right angles. 


So what does this have to do with our PatternMaker pattern? It means you should remove the end lines.


Now fill the frame with black.


This is a really versatile pattern because it's easy to knit, done with modular construction (which means a series of small squares, and thus more frequent sense of accomplishment), and simple enough that I can knit it after a long day of computer work when my brain is tired. I think I'll do another version of this afghan soon, maybe in a different colorway. This afghan would lend itself well to gifts, but it also works well in college colors. 

Baby Girl blanket
Baby Boy blanket
Americana
Americana 2 
Eastern Carolina University
NC State 
Pt. Loma Nazarene 
University of North Carolina
University of Oregon


Thursday, April 18, 2013

How to Make an Argyle Pattern in InDesign

This article will teach you how to make an argyle pattern using InDesign and Teacup PatternMaker plugin. Wikipedia has a great article on the history of the argyle pattern. This pattern is surprisingly simple to make, using only five objects. The magic is the a single blending mode.

First, choose a few colors you like and add them to the swatches panel. You'll probably change them later, as you experiment with blending modes. But for now, start with a few swatches in the swatches panel. They have to be in the swatches panel in order to show up in the dropdown menu of PatternMaker color choices.

I like pink and purple, because those colors are predominant in the splash screen of InDesign (which, if you don't already know, is my favorite software). Plus, I'm a woman, and we tend to like pink.


Next, draw a big frame and apply the PatternMaker "Lines" pattern.


Now, you may be thinking, "Why are we drawing dashed lines when what we need is a bunch of diamonds?" First thing we need to do is to turn off the dashes.


Next, make the Stroke Weight really thick, and then change both the angle and the line distance. I made my Line Distance 26 pt, Angle 60 degrees, and Stroke Weight 13 pt. The key is that the line distance needs to be double the stroke weight. That is what will give us nice perfectly symmetrical diamonds.

Now for the next color: Copy, paste in place, and change the angle to a negative number. Oh wait! You can't? Me neither.


So instead of using a negative line angle within PatternMaker, simply flip the object horizontally. Like so:


Next, add a blending mode to the top frame. I chose Darken. But you might prefer a different color mode.


Next, copy, and paste in place. Put the blending mode back to Normal. In the PatternMaker panel, change the Stroke Weight to 1 pt and the color to Paper.


Again, copy and paste in place, then flip horizontal.


Now we have a basic argyle pattern, but I think it needs a bit of color in the background. Make another rectangle and color it brown. Send it to the back.


Now, you might like the way this looks, but I think it's kind of ugly. I don't want the purple interacting with the brown background. So we need to isolate the pink and the purple lines so that those are the only two objects affected by the blend mode of the purple lines.

When you have a bunch of objects stacked on top of each other, all with the same bounding box dimensions, it's rather troublesome to select just the ones you want without moving all the others out of the way. Enter: the Layers panel.


With Layer 1 twirled open, I can see all five objects. I know that the rectangle at the bottom is the brown frame. And I want just the two objects above that. So click on one of the little squares next to the object name, then shift+click on the little square directly above it. That will select both the purple lines and the pink lines.

Next, group them and in the Effects panel, click "Isolate Blending."


That's the basic idea. You can change up your patterns by making the thin lines dashed, changing the line angle, colors and blending modes.


Happy Patterning!