Showing posts with label Thumbnails. Show all posts

Saturday, January 20, 2018

Quick and Dirty Page Imposition Using Only Acrobat

Today I was working on a 1-up half page flyer of which I need to print multiple copies. Normally, I would go into InDesign and manually impose the document 2-up and then export a new PDF. But I wanted to see if I could get an acceptable result right within Acrobat. The following screenshots are of the Thumbnails panel, but you can achieve the same thing using the Organize Pages tool.

Thumbnails Panel: 1 page

Much like in the other Adobe programs, if you hold down and Option and drag, you will duplicate the object. In this case, I held down Option while dragging the thumbnail. Now I've duplicated page 1. Read more about that technique here.

Thumbnails Panel: 2 pages

Next, go to the Print dialog box and choose the "Multiple" tab. This will only work if you have more than one page. That's why I had to duplicate page 1, so that Acrobat would actually have multiple pages to put together on the same page.

Print Dialog Box: Multiple Tab

You can also make a four up imposition using the same method. Duplicate pages 1 and 2 again, to get four of the same pages. Then choose 4 up per page.

Print Dialog Box: Print four up!
Now, remember that the borders won't be exact all the way around, so this imposition method won't be suitable for all applications. But if you just need to take a flyer and quickly print out multiple on a page, this can be a great tool. Also note that this trick won't work in Adobe Reader, because it requires page editing.

Tuesday, November 25, 2014

More Than You Ever Wanted to Know About Acrobat's Page Thumbnails Panel

Did you know that Acrobat's Page Thumbnail panel has all kinds of useful and (perhaps even interesting) information about viewing percentages and selected page ranges? Probably not, because the UI is very small and so understated that it's tough to tell that it offers any helpful information. Talk a walk with me as we explore the Page Thumbnails panel together. To access the Page Thumbnails pane, click on the page icon at the top left of the PDF document.

Tiny Black Square

The black square in the lower right indicates the viewing area. It's sort of like the Navigator panel in Photoshop. In the case of this first image, I am viewing page 18-1.


But in the case of this second image, I am viewing page 10-7 (as indicated by the black square), but have page 10-8 selected (as indicated by the blue highlight).


In the case of this third image, I am viewing page 2-9, and also have page 2-9 selected.


When viewing pages in the Page Thumbnails pane, the location of the little black square will be determined by the zoom percentage.

Viewing at 100%
When you are zoomed in far enough, the little black square will also be accompanied by a black outline of the viewed area. The rest of the thumbnail is grayed out.

Viewing at 150%
 When you are zoomed in farther still, the outline will shrink even further.

Viewing at 300%… Left
You can use the document scrollbar to move scroll the document viewing area to the right; the black outline in the page thumbnail will move accordingly.

Viewing at 300%… Right
Alternatively, you can also click on the black outline and move it around. Be sure to hover directly over the black outline before you click. You'll know when you are hovering over the correct spot when the black arrow turns into a hand.


Blue Highlights

The blue highlighted background indicates which page/s you have selected in the Page Thumbnails Pane. By click and shift + clicking on a range of pages, you will select multiple pages. The page with the darker blue background is the first page you have selected (first click). The page with the darker blue outline is the last page you have selected (shift + click). If you were to go to File > Print, these are the pages that would print.


In this next image, I clicked first on page 17-10, and the shift+clicked on page 17-7. The result is that the blue outline and border are reversed from how they appear in the image directly above.


You can print a non-sequential page range by Cmd/Ctrl clicking on each of the page thumbnails. Alternatively, you can select the first page range by Click + Shift Clicking on the first page range, and then Cmd/Ctrl clicking on the remaining page thumbnails.


See how the page range is already filled in at the print dialog box?


More on the Page Thumbnails Panel...

If you found this article useful, you may also like one of other articles on the obscure and little-known functionality of the Acrobat Page Thumbnails Panel: How to Replace Pages in a PDF using Acrobat's Pages Panel.


Wednesday, October 1, 2014

How to Replace Pages in a PDF using Acrobat's Pages Panel

If you've been working with PDFs in Acrobat for awhile, you've more than likely needed at some point in time to replace pages in a PDF. So how do you normally go about that? Either using Tools > Pages > Replace


or Page Thumbnails > Options > Replace Pages...


But I wondered if there was a more graphical way to go about replacing pages. What I mean is this: we can drag the page thumbnails around in the pages pane and rearrange pages. We can even open up two PDFs and drag a thumbnail from one to another a source PDF to a target PDF to add a page. But what about replacing pages?

After a bit of experimenting, I finally figured it out. If you've ever used symbols or patterns in Illustrator, you're familiar with the idea of holding down modifier keys while you drag new artwork over the symbol or swatches icons in the respective palettes. The same idea holds true here, only it is much less obvious.

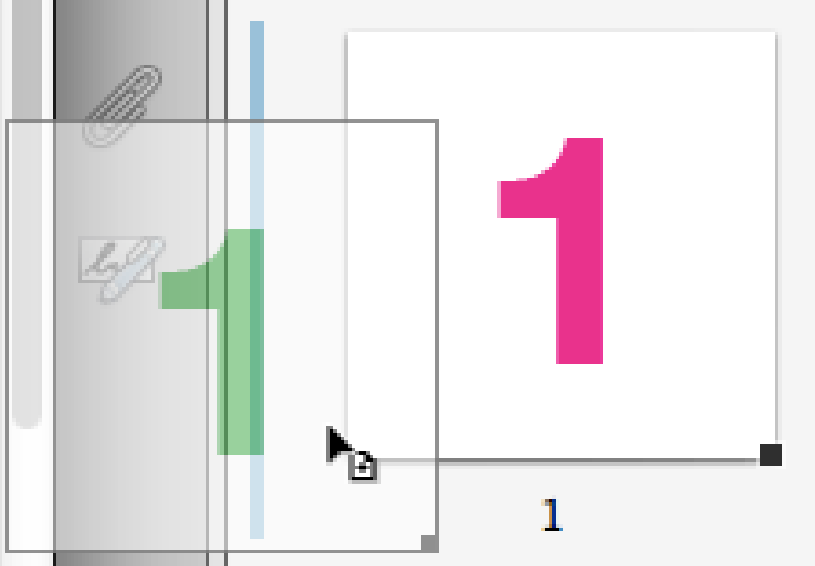
 I think the reason this feature is not known is because of the ridiculously small icons Acrobat uses during the move maneuver. They are so small, they are practically indistinguishable, and look like no more than specs of dust on the screen. But I digress.

Insert a Page from Another PDF

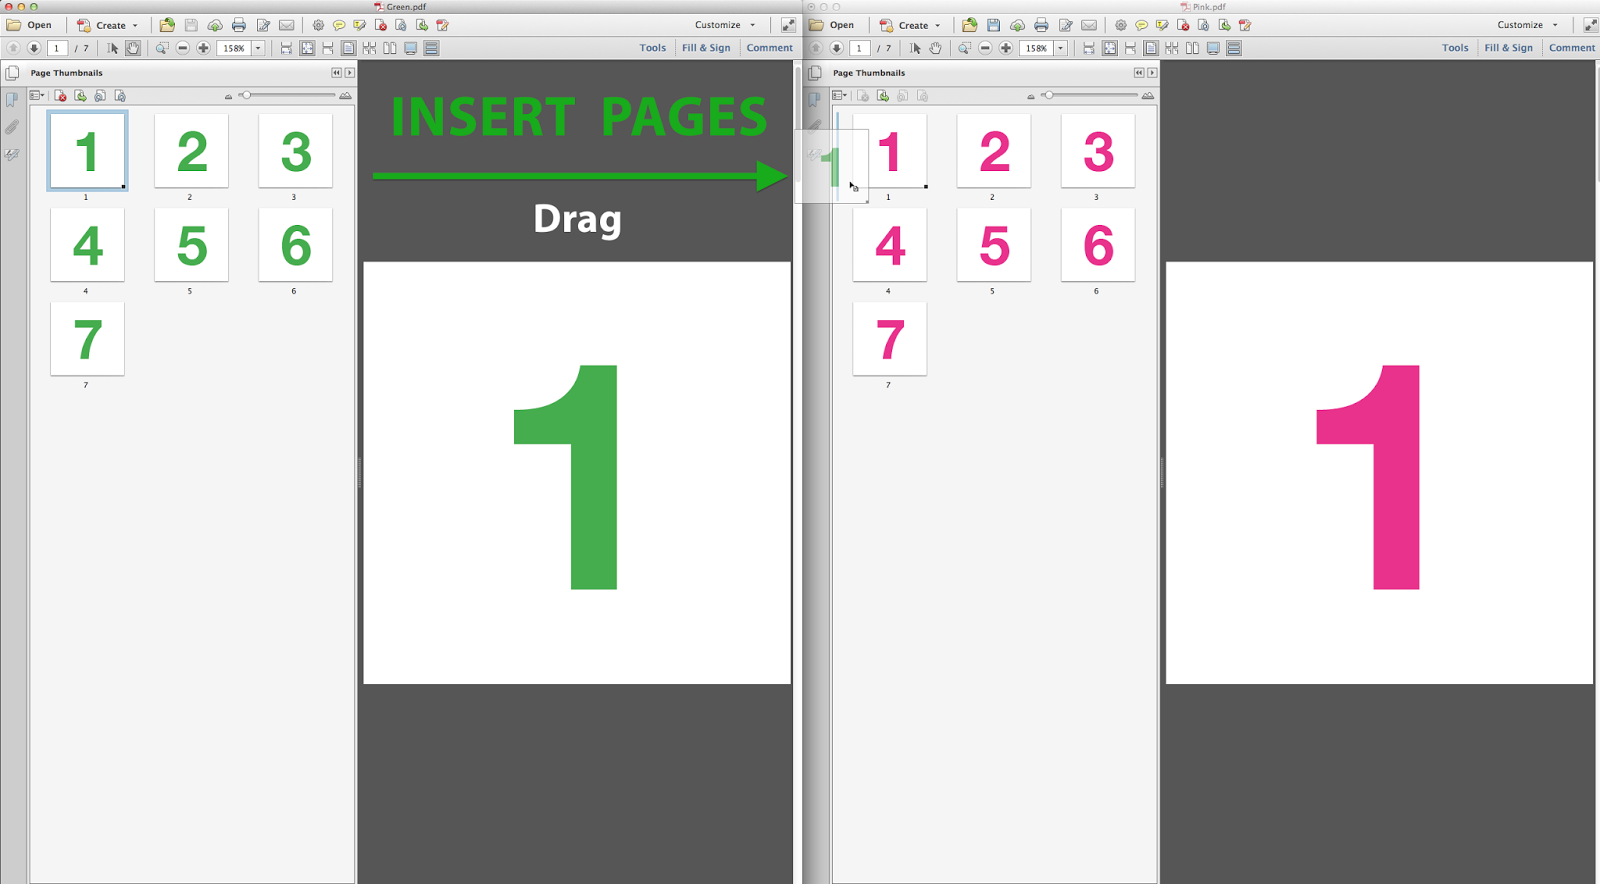
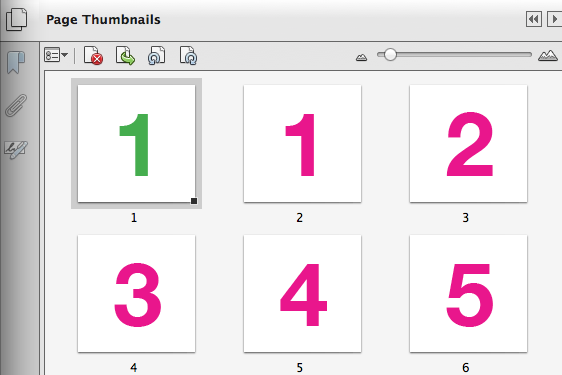
Select a thumbnail of the source PDF and drag it to the thumbnails pane of the target PDF. The page is inserted wherever the blue line appears. (Click on the graphics to enlarge them.)

Drag to Insert a Page
Inserted Page
INSERT Page Icon: A tiny little plus sign

Move a Page from Another PDF

To move a page from one document to another: hold down the Cmd key when dragging. This will move (or remove, if you prefer) the page from the source document and add it to the target document. The page will be added wherever the blue line appears. Note: The source document must contain at least two pages, or you will get a "Bad Parameter" error. And then Acrobat will probably crash...

Move Pages

Obligatory "Are You Sure" Disclaimer


Page 1 has been removed from the source PDF and moved to the target PDF
MOVE Page Icon: Dog-eared Paper

Replace Page using one from Another PDF

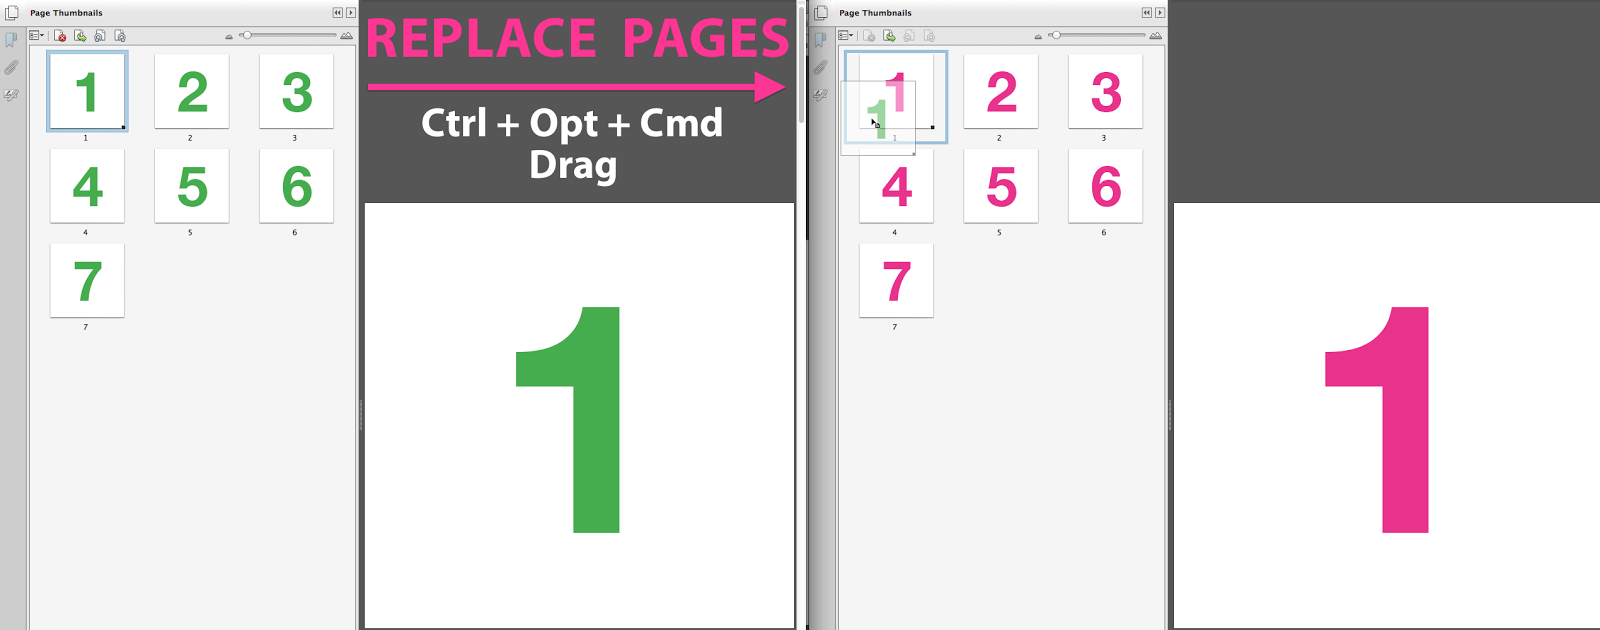
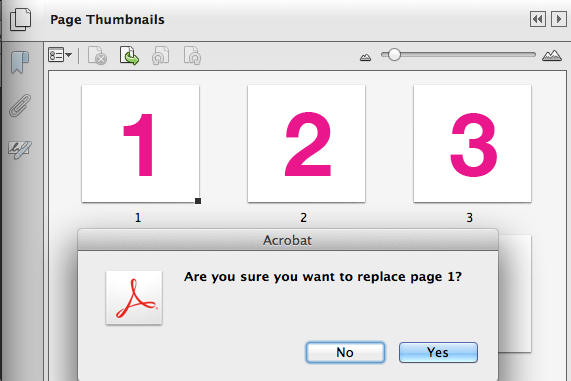
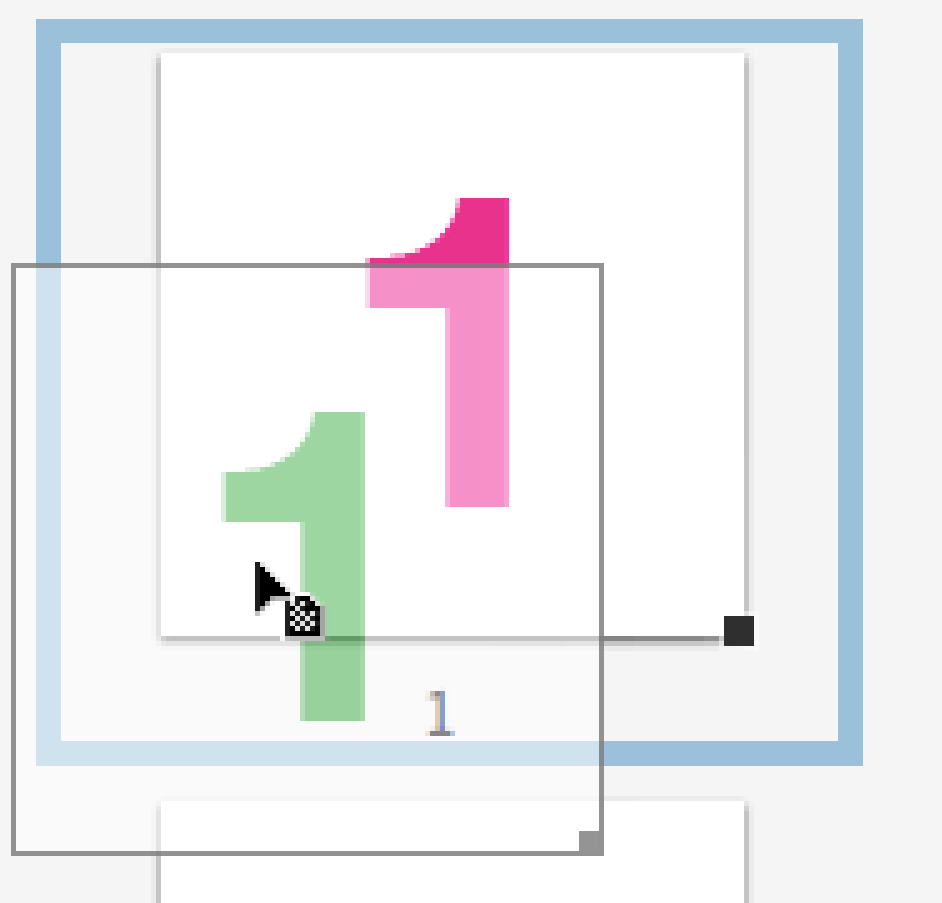
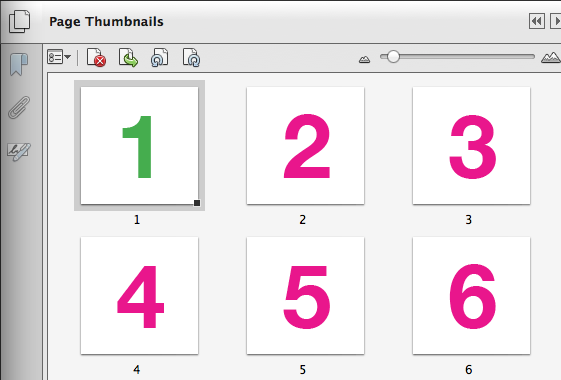
To replace a page in one PDF, using a page from another PDF, drag from the source PDF to the recipient PDF, while holding Ctrl + Option + Cmd. A blue border appears around the entire page thumbnail. Once you click through the "Are You Sure" warning, the page will be replaced in the target document, and still remain in the source document.


Replace Pages

Obligatory "Are You Sure" Disclaimer
REPLACE Pages Icon: Checkerboard Pattern and Big Blue Border
Pages replaced in PDF. Original source PDF remains intact.

If you found this article helpful, you may be interested in a related article: More Than You Ever Wanted to Know About Acrobat's Page Thumbnails Panel.