Showing posts with label hyperlinks. Show all posts

Friday, January 31, 2014

Help! Where Did the Cross References Panel Go?

You may have heard the buzz recently about InDesign’s and improved hyperlinks panel. Rufus Deuchler made a great video about it here. Hyperlinks are now simpler to make and easier to edit. But I want to point out that what’s been a bit glossed over is how the Hyperlinks panel has changed: specifically, what has been removed from the Hyperlinks panel.

Read the entire article at InDesign Secrets.


Friday, June 24, 2011

The Pitfalls of Editing InDesign Hyperlink Destination Names

Today I was working on updating a old document with my email address in it. I decided to create a hyperlink from my email address. In the Hyperlink Panel, I chose: New Hyperlink From URL. Pretty simple so far.


Bu then I remembered that I needed the link should have a "mailto:" at the front of it. So I double click on my email link then click on my email address next to Destination Name. Then I choose "email." That should do the trick. 


So now I have my email address set up, the destination says it is set to my address, it all looks good.


But then I hovered over my hyperlink. And guess what I saw? My old email address from 3 years ago! What?!


It turns out that the URL referenced in the Edit Hyperlink dialog box isn't updated until you close the dialog box. I doubled click on the hyperlink to investigate, and this is what I saw:


You see, a few years ago when I originally set up this document, I didn't like the name that InDesign gave to my hyperlink destination. It was full of code and was unattractive looking. I wanted something cleaner looking, and shorter. So I went in and edited the ugly name of the hyperlink destination to something more attractive. Doesn't the short pretty name (email) look much nicer? 

Ugly Hyperlink Destination Name

Pretty Hyperlink Destination Name

Now, fast forward three years, to today. I had completely forgotten about having edited the name of this hyperlink destination. But when I chose to use the old named hyperlink destination "email," I unknowingly created a link to the incorrect email address.

The moral of the story is to never trust named Hyperlink Destinations. You need to double check to see that they reference the correct URL.

By the way, if you know of a way to take a a screen shot while still showing tooltips, please leave a note in the comments. Once again, I had to take a picture of my screen using my iPhone. Thanks!

Friday, May 8, 2009

Inline Buttons: How to make a URL in a PDF Underline on Hover

PDFs have long been my favorite online medium of choice, from a designer's standpoint at least. There are no hacks, no browser issues, no cross compatibility differences. I can design a page and things stay where I put them.

However, there are some aspects of web pages that are not easily duplicated in a PDF. Since the Adobe acquisition of Macromedia, media such as flash can now be embedded in a PDF. However, seemingly less complicated features of web pages cannot be replicated in a PDF. At least not very easily.

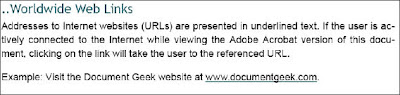
PDF hyperlinks are typically within body text. I have often wanted to have my PDF hyperlinks be a little more noticeable, but not with a big tacky underline. This is possible in web sites by using cascading style sheets, but it is not so simple to replicate in a PDF. However, there is a way to replicate this feature, and to do so, we will be using the button palette.


In InDesign, text within a text frame can be styled with paragraph and character styles, but it takes a few extra steps to create a rollover effect for a span of text within a text frame.

  1. Highlight the piece of text you want to create a rollover for.
  2. Cut it out and place it in it's own text frame.
  3. Fit frame to content. That is because the button size will be based on the size of your text frame.
  4. Create a new character style for what the text will look like in its hovered-upon state.
  5. Select the text frame and create a button from it.

  6. Click on the rollover pane of the buttons panel. The button serves as a sort of container for both of its states. Both states can be stylized and manipulated independently, as can the button itself. To either of the states, or to the button as a whole, you can add a drop shadow, varying levels of transparency, any any number of visual effects.
  7. Now stylize the text with the new rollover character style. You may find that if you use an underline, you may need to expand the text frame just a touch. Note that the two states of the button must now must be manipulated independently.
  8. So if you need to make the text frame larger, you'll need to do it to both the normal and the rollover state of the button. If you find that your text effects result in overset text, it is a good idea to undo few steps and make the original text frame just big enough to house the effects you're going to apply. That way, you won't have to make both the normal and rollover text frames larger. This is important because if you don't make the sizes of both the normal frame and the rollover frame match exactly, the text will jump around inside the frame when you hover over it. And that's just tacky.
  9. Once you text is styled for both states (normal and rollover), you're ready to put the text back in it's place within the flow of the body copy. So, select the button and cut it.
  10. Place your text insertion point back into the spot you originally cut the link from. Paste the button. The button text may not rest exactly at the baseline with the rest of the text, so nudge it down a little to make it match.
  11. Now, export a PDF with the interactivity check box checked. When you mouse over the hyperlink, it should now have a rollover state.
This is a fairly labor-intensive technique, and probably isn't suitable for documents containing hundreds of links. However, it is a nice technique to dress up a special PDF. Click here for an example of the technique in action.