 |
| Fox News Floor Tile Afghan |
I have provided instructions for two ways to create this pattern:
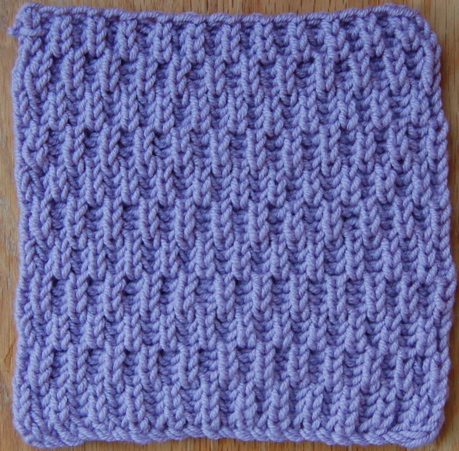
The project we'll be creating is basically a bunch of squares set in a checkerboard pattern. And instead of cold hard floor tiles, our result is a soft, fluffy blanket. Knit as it as big you want, just by adding more squares...or in my case, knit it as big as you can until you run out of yarn. Then try desperately to find more yarn of the same color (which is impossible when the two colors of yarn you used are either backordered or discontinued). Finally, knit a border of your choosing and stitch it on. For my border, I chose Twin Leaf Lace from Nicky Epstein's Knitting on the Edge. I wanted to add the border on all four sides, as was done on the floor tile design at Fox News, but again, I ran out of yarn. So my blanket just has a border on two sides. I still think it looks pretty.
How to Create the Squares Using Knitting
First let's look at how the individual square is constructed. It consists of five stripes, with the top and bottom stripe being a little bit thicker than the center three stripes. I want my squares to be about 7"x7", and I have already determined my gauge to be five stitches/in, so I need somewhere between 30 and 40 stitches in my square. The trick is figuring out the number of rows for each stripe that will give me the correct stripe heights, and yet still have the overall shape be perfectly square. After doing a little math and making some sketches, I determine that the top and bottom stripes need to be 8 ridges (16 rows), and the center three stripes each need to be 5 ridges (10 rows). The total number of ridges is 31 (62 rows). Since in garter stitch, the number of ridges is equal to the number of stitches, we'll be knitting a square 31 stitches wide.

Cast on 31 stitches.
Knit 8 ridges (16 rows) in black.
Knit 5 ridges (10 rows) in tan.
Knit 5 ridges (10 rows) in black.
Knit 5 ridges (10 rows) in tan.
Knit 8 ridges (16 rows) in black.
You can bind off on the last row and have a complete square, or you can leave the stitches live and knit one live stitch from the first square together with the last stitch on each row of the next square (which you'll knit at a 90 degree angle to the first square). I like to leave my stitches live, because I find that knitting the live stitches together makes for a smoother join than binding off and then picking up the bound off edge.
Knit each square perpendicular to the adjacent squares. Be sure that when you're starting a new square, that you have the right side facing you. Because garter stitch is so rhythmic, so soothing, that it is all too easy get in the groove, happily knitting away...and then when you're done with a square, realize that you've knitted it onto the afghan with the back side facing forward and then you have to rip it out and redo it. This is especially problematic when knitting late at night, in a dimly lit living room, after a long day of mentally challenging work. Pay attention when starting a new square and double check your work! Reknitted yarn never looks as good as yarn that's only been knit once. But hey, if (when) you mess up, at least garter stitch is easy to pick back...it's a lot more forgiving than brioche or spanish lace.
How to Create the Squares Using Adobe InDesign
Step 1: Like any graphic design project, I first need to consider my final output size and create an appropriate sized document. My final output of this design will be laser printers, outputting standard sized paper. So I first create an 8.5" x 11" document.


Step 3: Next, create a square text frame equal to the width of two squares. Because each square is 31 stitches wide, our text frame needs to be 62 mm high by 62 mm wide.

Step 4: With your text insertion point in the frame you just made, insert a Table 10 rows by 10 columns. We'll be merging some of the rows and columns to create the final design.


Step 4: Because we'll be using this table to create blocks of color with very specific measurements, we don't need any of the strokes. So select the entire table and set all the strokes to 0.

Step 5: Start setting up your column widths. Because the first stripe is 8 ridges tall, we need the first row to be exactly 8 mm high.

Step 6: Next set the next three rows to be exactly 5 mm high.

Step 7: Set the fifth row to be exactly 8 mm high.

Step 8: Merge the first five cells in the first row.

Step 9: Do the same with the next four rows.

Step 10: Add colors to your first five rows.

Step 11: Repeat steps 8-10 for the lower right set of cells to make up the second square. You can either merge the columns manually, or simply copy and paste from the top left square. But be sure to note that the copy and paste function does not copy the width and heighth of the cells. It only copies the content (which in this case, is how the cells are merged, as well as their fill color).

Step 12: Set the height of the cells to match the square in the top left (8, 5, 5, 5, 8). You'll notice that the table now perfectly fills the 62 mm square text frame.

Step 13: To create the next two squares, merge the rows similarly to how you merged the columns for the first set of squares.

Step 14: Set the column width to the same measurements used for the first set of squares: 8mm, 5mm, 5mm, 5mm, 8mm.

Step 15: Add fill color to the second set of squares. I find that the easiest way to add fill colors to a cell is by dragging swatches and dropping them on whichever cell you want to fill. It just too easy to accidentally select too many rows/cells. Interestingly, you can also drag and drop swatches onto frame strokes, but it's a lot harder. You have to position your mouse just right, and if your table is the same size as your text frame, chances are pretty good that you'll drop the swatch a little too far over and inadvertently fill the cell instead of coloring the object stroke. So I like to stick with using drag-and-drop coloring just for fills.

Step 16: Step and repeat to quickly make the afghan design bigger. By creating as a grid, and setting the horizontal and vertical offsets to exactly the same size as the table, we can instantly make the design huge. Go to Edit > Step and Repeat.


If you like this article about InDesign and Knitting, you may be interested in one of my other articles, Using Teacup PatternMaker to Mimic Knitted Garter Stitch.
I also figured out a way to create this same pattern using Teacup PatternMaker.
No comments :
Post a Comment