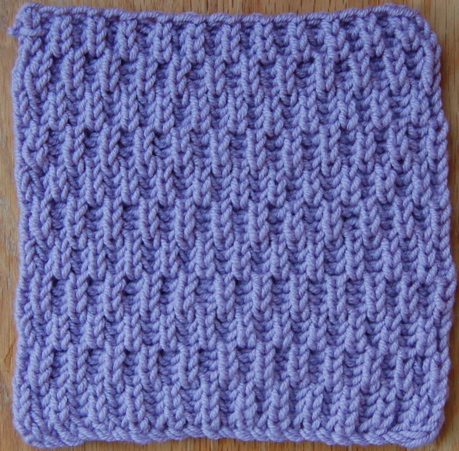
Showing posts sorted by date for query garter stitch. Sort by relevance Show all posts

Tuesday, July 2, 2019

Cotton Shimmer Shawl (Knitting Pattern)

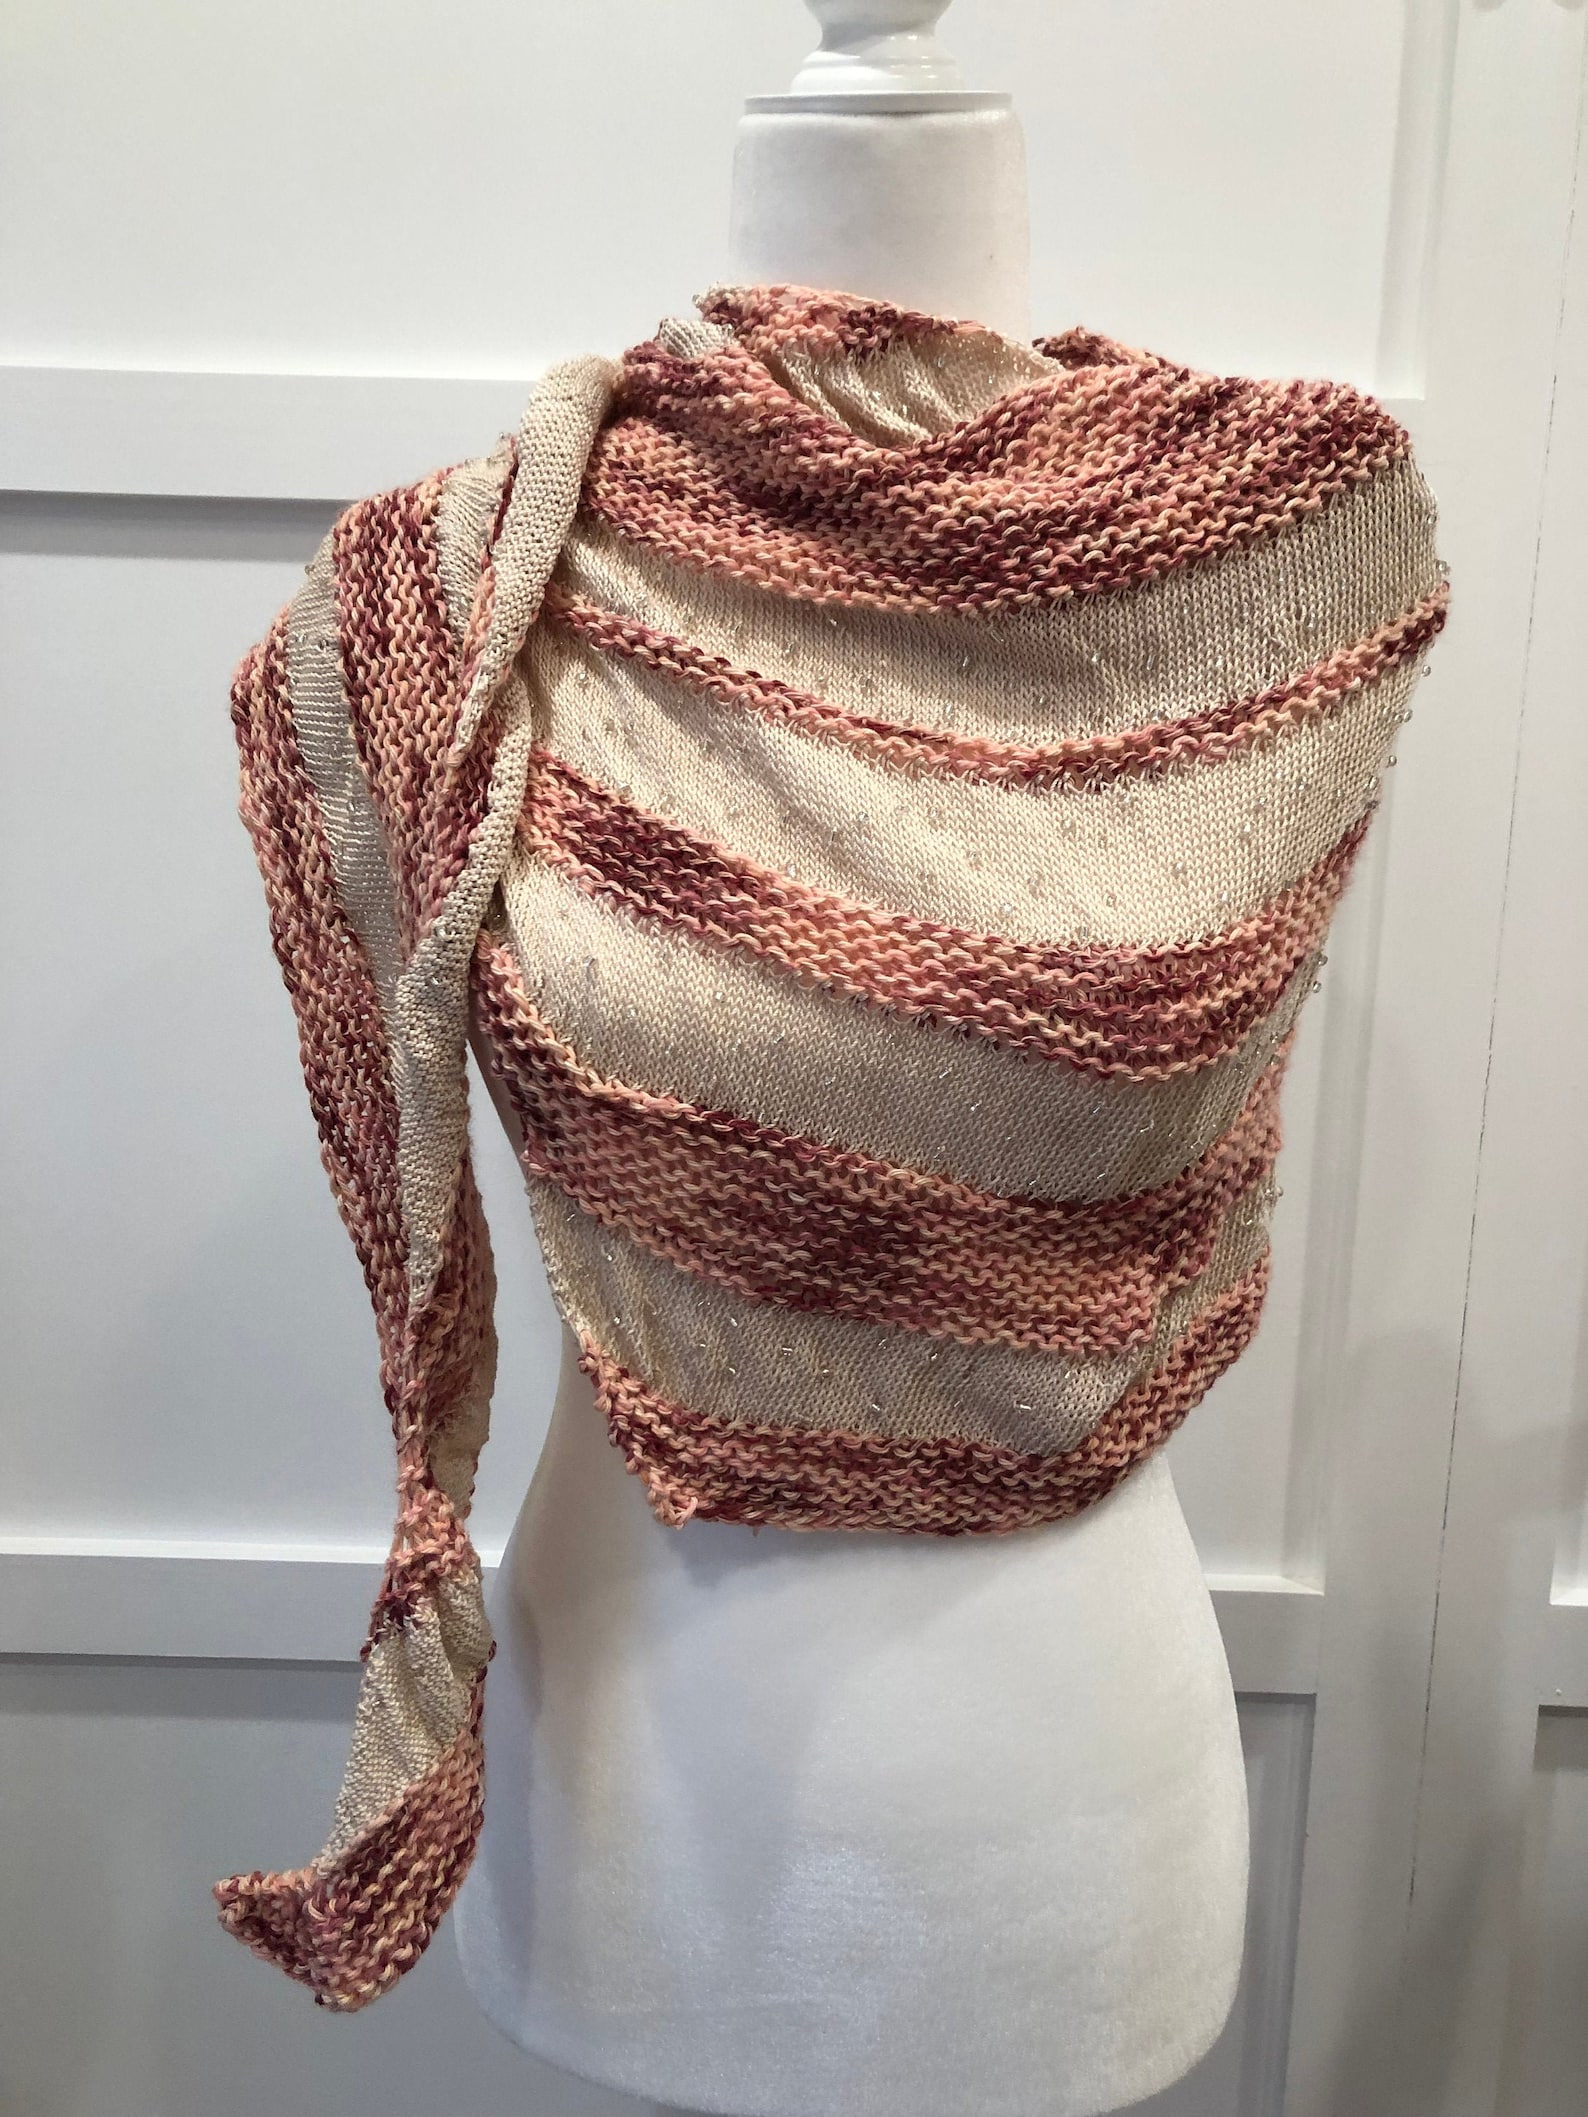
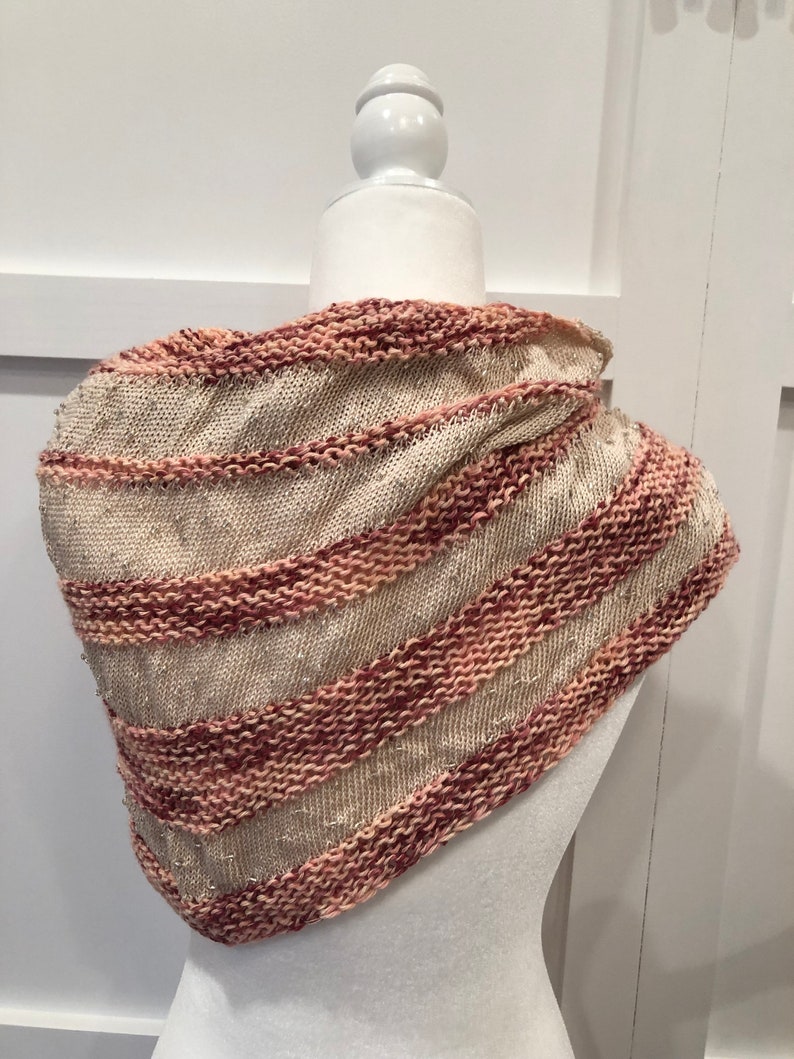
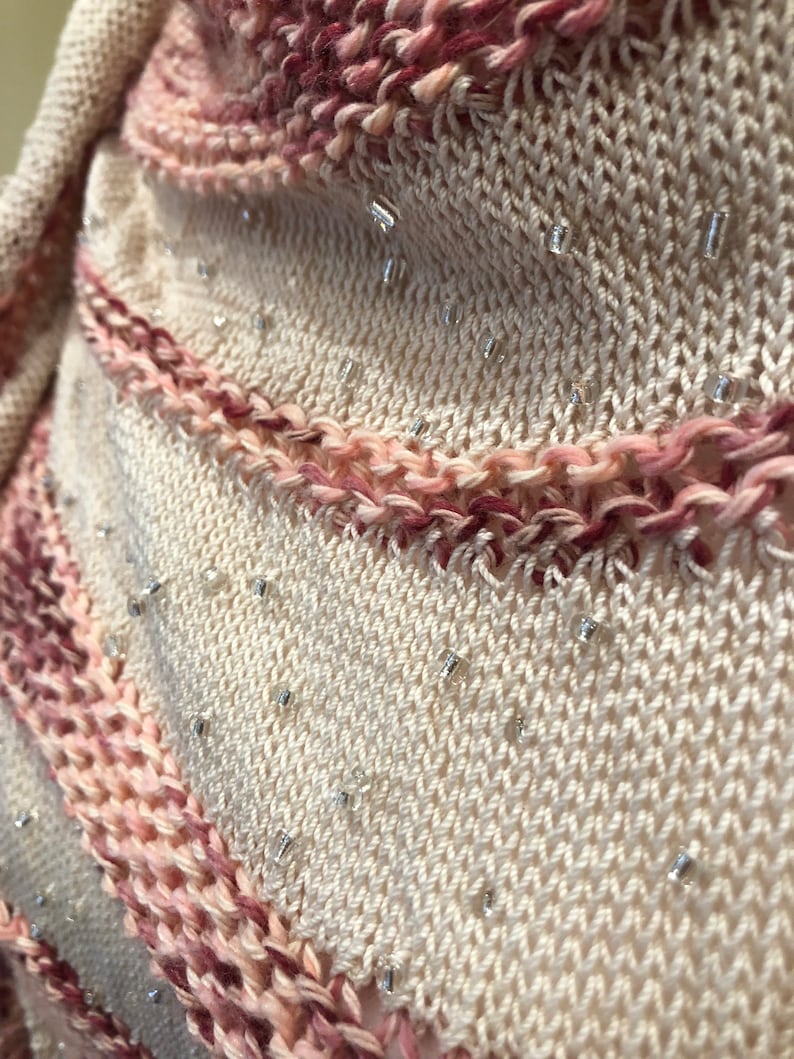
Using affordable and widely available yarns, this shawl uses three simple design elements to create a stunning shawl. You’ll be using: two different types of yarn, two different needle sizes, and beaded knitting. The mercized cotton thread, worked in beaded stockinette stitch, offers a visually interesting contrast to the chunky garter bands. Since both yarns are cotton, this wrap makes the perfect accessory to take the chill off on a crisp spring day.

Materials

  • Lion Brand Comfy Cotton, Approx 125 g.
  • Red Heart Classic Crochet Thread: “Natural” (approx 175 yards)
  • Package of #10 glass E beads (40 g/1.41 oz)
  • Size 10 US (6 mm), 24” circular needles
  • Size 4 US (3.5 mm) 24” circular needles


Monday, December 5, 2016

Number Knitting #3: So Why am I Republishing "Number Knitting?"

So why this book? What's so special about it?

This book is based on a method of knitting that's actually patented! It's based on garter stitch knitting. Many knitters are familiar familiar with the garter sticth pattern of the famous Elizabeth Zimmerman. What's so amazing about "Number Knitting" is that the author was a contemporary of EZ, yet most people have never heard of her. 

Why the Long Production time?

The reason for the lengthy production process is the very nature of a knitting book: it is a book of instructions on how to make a particular knitted object. In the case of this book, it is around 275 pages, and contain instructions to create 75 different projects. The projects range from small objects, like a placemats and scarves, and go all the way up to very large objects, like a huge lace shawls and complex jackets and coats. The small items could take a couple of evenings to knit, but the large objects could take many weeks, or even several months.
Snowflake Scarf
Snowflake Scarf
Gold Butterfly Stole
Hampton Shirt
Hampton Shirt
My goal is to knit all the items in the book, so that I can take new color photographs. In the meantime, to help generate some interest, and to begin to bring life back to the patterns, I have been colorizing them in Photoshop, according to the colors listed in the book.
Tropical Leaf Car Throw
It's a momentous task, and I have hundreds and hundreds of hours ahead of me. If you are a knitter, and would like to help reknit the items in the book, please consider joining our Ravelry Group. Ravelry is social media and portfolio platform where we discuss all kinds of knitting related things for this book project: things like technical questions regarding various ways to join pieces together, how to interpret the knitting charts, etc. (For you non-knitters reading this, Ravelry sort of like Facebook+Behance+Amazon+Pinterest+Messages, with an inventory database system thrown in the mix. It's amazing!)

Wednesday, August 12, 2015

Atlantic Triangles Waves Afghan Pattern

In addition to being a graphic designer ad technical publisher, I am also an avid knitter, and I enjoy designing afghans based on geometric shapes. I designed this afghan after a trip to the Atlantic ocean. To read about the backstory, click here.


Would you like to purchase the pattern for this afghan?


Description

This afghan is modular, constructed entirely in garter stitch. It uses one color at a time, and is easily adapaptable to a variety of yarns and colorways. I find it is a great use for the odds and ends of yarn that I have built up in my stash.

The repeating triangles compose a rythm. Should you choose to use of a variety of yarns in the design, the triangles will add some continuity to the piece. The white row separators serve as a visual respite between the triangles of color, and add further uniformity to the overall design.

Design Notes

The afghan can be constructed simply be repeating a series of triangles, rectangles, and trapezoids. Each stripe is constructed from the bottom up, using only one color at a time.

The long divider bars that separate the stripes are completed after the entire length of the strips are knitted. Using grafting, these long divider bars join the strips together.

Because this pattern is based on triangles, you can create new designs by rearranging the triangles and trapezoids.

While most of afghan is created using knitted garter stitch, one small section is created using purled garter stitch.

Final Size: 76" x 133"

Yarn

I used Plymouth Encore, worsted weight: 100 g balls (200 yards/ball).
MC (Colored) yarn: 12 balls, 2 each of six different colors
(1 ball for each strip of 7 triangles).
CC (White) yarn: 5 balls.


Big enough to fit an entire family under!

Would you like to purchase the pattern for this afghan?

Saturday, April 20, 2013

Use PatternMaker to Design a Geometric Color Block Pattern

In a post a couple of years ago, I explained how to design a pattern in InDesign that mimicked an afghan I have made. That method used tables and some creative cell-merging.


But this evening I figured out how to create this same pattern using PatternMaker.

The original design was based on knitted garter stitch, which incidentally is my favorite type of knitting. I have details of the afghan construction here.

So, to keep it simple, I'll be using points as my measurement of choice for this pattern. That'll let me easily use the same increments as I did in my original post (8, 5, 5, 5, 8), for square that is 33 x 33.


Start with a square 165 pt x 165 pt and fill it with the "Weave" pattern. (I chose 165 because each square will be 33x33. And 33 x 5 = 165).


Change the Line Color (not to be confused with the Endline Color).


Next, change the Number of Lines to 2 and the Angle to 0.


Since the original design was based on a 33 stitches of knitting, we want to match those proportions. So change the Weave size to 33. See how the set of 5x5 squares line up perfectly inside the frame now?


Now, increase the Line Weight to 5.


My original squares were just stripes (no black borders on the sides). In the final afghan, they just appeared to have black vertical bars because the squares were joined together at right angles. 


So what does this have to do with our PatternMaker pattern? It means you should remove the end lines.


Now fill the frame with black.


This is a really versatile pattern because it's easy to knit, done with modular construction (which means a series of small squares, and thus more frequent sense of accomplishment), and simple enough that I can knit it after a long day of computer work when my brain is tired. I think I'll do another version of this afghan soon, maybe in a different colorway. This afghan would lend itself well to gifts, but it also works well in college colors. 

Baby Girl blanket
Baby Boy blanket
Americana
Americana 2 
Eastern Carolina University
NC State 
Pt. Loma Nazarene 
University of North Carolina
University of Oregon


Saturday, July 28, 2012

Gift Ideas for the InDesign Geeks in Your Life

I've been collecting cool gift ideas for InDesign users and I wanted to share them with you. Honestly, these ideas were mainly ideas I gave to my own  family members. But some of these ideas are so great, I think that other InDesigners should know about them as well. While there are plenty of generic-graphic-design-y gifts, these are primarily relating to InDesign.

Custom License Plates: $30-60

My husband got me this for my birthday. I'm still kind of shocked that the plate was even available. I thought for sure another InDesign user in North Carolina would've already snagged it. But lucky for me, they didn't!


InDesign-inspired glass: $15 and up

I found this glass on Etsy. I was looking for a local artist here in Raleigh from whom I could buy something pink.


But if Illustrator, Photoshop, or Acrobat are more your thing, she also has nice designs in orange, blue, and red. Sure, normal people might not know what the colors represent, but your software geek definitely will. I think the red business card holder would be especially appropriate for anyone who makes interactive PDFs.


File Extension Jewelry: $24

How much do I want this necklace? A lot. This artist has a variety of other Creative Suite extensions as well (.psd, .ai, .fla), plus necklaces for Save and Undo. How fun would it be if she also started offering .idml and .icml? Or maybe .indb, .inx, .indl, or .idms?


Pink Pillows: $15

These pillows come in a variety of sizes. The little ones would make great ornaments. The company who makes them used to be backordered for 6 weeks, but they've recently ramped up production and you can get your pillow relatively quickly now. Like any smart business catering to graphic designers, they also have pillows for  all the other Creative Suite applications (even Bridge!). The photos of the large pillows on their home page are CS3 branding. The mini pillows have been upgraded to CS5. I'd be curious to see if they will be doing any new pillow designs for CS6.


Pink Yarn: $84.99

Now, I know that most InDesign users don't knit, but I also know a fair number that do (myself included). This yarn is a sampler pack of fingering weight, 100% wool. I just finished making an afghan using this yarn (worked using #4s, in garter stitch, in case you're interested.) Plus, this yarn is at a truly amazing price! If your software geek is into a different program, they have other colorways as well. 

Friday, March 11, 2011

How to Make a Gingham Pattern in InDesign

This technique is easy when using TeaCup PatternMaker.

The gingham pattern is popular in weaving. The plaid effect is achieved by a stringing the loom (vertical warp threads) in a striped pattern. Then, when you're weaving your horizontal threads (weft), you weave in the same striped pattern. The darkest blocks of color are occur where the dark warp threads and the dark weft threads intersect. The mid-tone color occurs when dark warp threads overlap light weft threads (or vice versa). The white areas occur where white warp threads meet white weft threads.

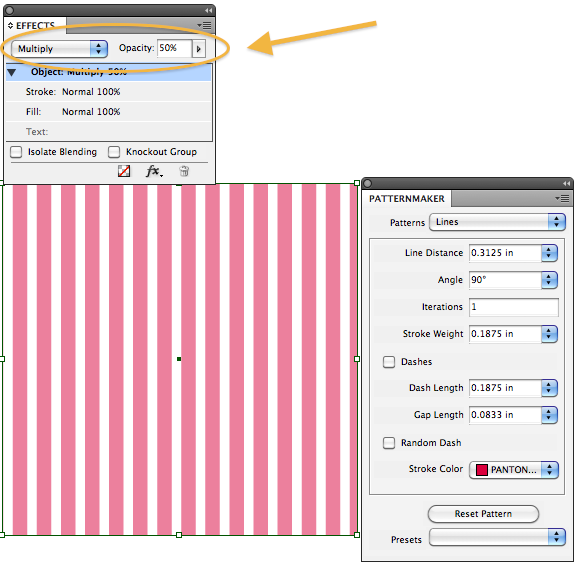
1. Make a rectangle and fill it with the Lines patterns, using the settings shown below. (Click on the images to see a larger version.)
2. In the Effects panel, set the blend mode to Multiply and the opacity to 50%.


3. Copy and then Paste in Place.
4. Rotate the square 90 degrees. Done!

That was so much fun I made four different colors!


If you like this article, be sure to read my other article: Using Teacup PatternMaker to Mimic Knitted Garter Stitch.

Thursday, March 3, 2011

Using InDesign Tables to Design a Geometric Color Block Pattern

This article is about how I designed a knitted afghan to mimic the floor tiles on the Fox News network.

Fox News Floor Tile Afghan

For years, I have been fascinated with garter stitch, which has a magical 2:1 proportional ration of rows: stitches. I wrote about this quite extensively in one of my other blog posts, Data-less Tables: InDesign Meets Knitting. While that article focused on diagonal lines and triangles, this post will focus on stripes and squares.

I have provided instructions for two ways to create this pattern:
The project we'll be creating is basically a bunch of squares set in a checkerboard pattern. And instead of cold hard floor tiles, our result is a soft, fluffy blanket. Knit as it as big you want, just by adding more squares...or in my case, knit it as big as you can until you run out of yarn. Then try desperately to find more yarn of the same color (which is impossible when the two colors of yarn you used are either backordered or discontinued). Finally, knit a border of your choosing and stitch it on. For my border, I chose Twin Leaf Lace from Nicky Epstein's Knitting on the Edge. I wanted to add the border on all four sides, as was done on the floor tile design at Fox News, but again, I ran out of yarn. So my blanket just has a border on two sides. I still think it looks pretty.

How to Create the Squares Using Knitting
First let's look at how the individual square is constructed. It consists of five stripes, with the top and bottom stripe being a little bit thicker than the center three stripes. I want my squares to be about 7"x7", and I have already determined my gauge to be five stitches/in, so I need somewhere between 30 and 40 stitches in my square. The trick is figuring out the number of rows for each stripe that will give me the correct stripe heights, and yet still have the overall shape be perfectly square. After doing a little math and making some sketches, I determine that the top and bottom stripes need to be 8 ridges (16 rows), and the center three stripes each need to be 5 ridges (10 rows). The total number of ridges is 31 (62 rows). Since in garter stitch, the number of ridges is equal to the number of stitches, we'll be knitting a square 31 stitches wide.


So the basic square pattern goes like this:
Cast on 31 stitches.
Knit 8 ridges (16 rows) in black.
Knit 5 ridges (10 rows) in tan.
Knit 5 ridges (10 rows) in black.
Knit 5 ridges (10 rows) in tan.
Knit 8 ridges (16 rows) in black.

You can bind off on the last row and have a complete square, or you can leave the stitches live and knit one live stitch from the first square together with the last stitch on each row of the next square (which you'll knit at a 90 degree angle to the first square). I like to leave my stitches live, because I find that knitting the live stitches together makes for a smoother join than binding off and then picking up the bound off edge.

Knit each square perpendicular to the adjacent squares. Be sure that when you're starting a new square, that you have the right side facing you. Because garter stitch is so rhythmic, so soothing, that it is all too easy get in the groove, happily knitting away...and then when you're done with a square, realize that you've knitted it onto the afghan with the back side facing forward and then you have to rip it out and redo it. This is especially problematic when knitting late at night, in a dimly lit living room, after a long day of mentally challenging work. Pay attention when starting a new square and double check your work! Reknitted yarn never looks as good as yarn that's only been knit once. But hey, if (when) you mess up, at least garter stitch is easy to pick back...it's a lot more forgiving than brioche or spanish lace.

How to Create the Squares Using Adobe InDesign
Step 1: Like any graphic design project, I first need to consider my final output size and create an appropriate sized document. My final output of this design will be laser printers, outputting standard sized paper. So I first create an 8.5" x 11" document.


Step 2: Inches are my preferred unit of measurement, but I want to use the same numbers for my measurements that I am using for my stitches. Since I'm using a 31stitch pattern, I need to now choose a unit of measurement where I can have 31 units (whatever my units end up being) and still have my objects fit on a standard size page (which I set up when I created the new document). After  a little experimentation, I figure out that millimeters will work well for this purpose. 31 mm is almost 1.25", so I can fit several squares on the width of an 8.5" wide page. Now I simply go back into the Units and Increments section of the Preferences dialog box and change the Horizontal and Vertical units to millimeters.


Step 3: Next, create a square text frame equal to the width of two squares. Because each square is 31 stitches wide, our text frame needs to be 62 mm high by 62 mm wide.


Step 4: With your text insertion point in the frame you just made, insert a Table 10 rows by 10 columns. We'll be merging some of the rows and columns to create the final design.


Step 4: Because we'll be using this table to create blocks of color with very specific measurements, we don't need any of the strokes. So select the entire table and set all the strokes to 0.

Step 5: Start setting up your column widths. Because the first stripe is 8 ridges tall, we need the first row to be exactly 8 mm high.


Step 6: Next set the next three rows to be exactly 5 mm high.


Step 7: Set the fifth row to be exactly 8 mm high.


Step 8: Merge the first five cells in the first row.


Step 9: Do the same with the next four rows.

Step 10: Add colors to your first five rows.


Step 11: Repeat steps 8-10 for the lower right set of cells to make up the second square. You can either merge the columns manually, or simply copy and paste from the top left square. But be sure to note that the copy and paste function does not copy the width and heighth of the cells. It only copies the content (which in this case, is how the cells are merged, as well as their fill color). 


Step 12: Set the height of the cells to match the square in the top left (8, 5, 5, 5, 8). You'll notice that the table now perfectly fills the 62 mm square text frame.


Step 13: To create the next two squares, merge the rows similarly to how you merged the columns for the first set of squares.


Step 14: Set the column width to the same measurements used for the first set of squares: 8mm, 5mm, 5mm, 5mm, 8mm.


Step 15: Add fill color to the second set of squares. I find that the easiest way to add fill colors to a cell is by dragging swatches and dropping them on whichever cell you want to fill. It just too easy to accidentally select too many rows/cells. Interestingly, you can also drag and drop swatches onto frame strokes, but it's a lot harder. You have to position your mouse just right, and if your table is the same size as your text frame, chances are pretty good that you'll drop the swatch a little too far over and inadvertently fill the cell instead of coloring the object stroke. So I like to stick with using drag-and-drop coloring just for fills.


Step 16: Step and repeat to quickly make the afghan design bigger. By creating as a grid, and setting the horizontal and vertical offsets to exactly the same size as the table, we can instantly make the design huge. Go to Edit > Step and Repeat.


Step 17: Now that the square/table design is done, I would finish designing the rest of the page, adding a pattern name, knitting instructions, a photo of the completed afghan, and contact info. But if you've gotten this far, you're probably a designer and already know what to do next. If you're really obsessive particular about small details, you can even rename your swatches to indicate what colors of yarn you used.

If you like this article about InDesign and Knitting, you may be interested in one of my other articles, Using Teacup PatternMaker to Mimic Knitted Garter Stitch.

I also figured out a way to create this same pattern using Teacup PatternMaker.