I have a beautiful striped blue dress that I love to wear in the spring and summer. It's knitted fabric, which makes it stretchy and comfortable. But it's also a rather thick fabric (due to the knitting technique used). It doesn't wrinkle and it's very flattering. I recently took a closer look at the fabric to see if I could determine how it was made and if I could recreate the look of the fabric in InDesign using
Teacup PatternMaker.
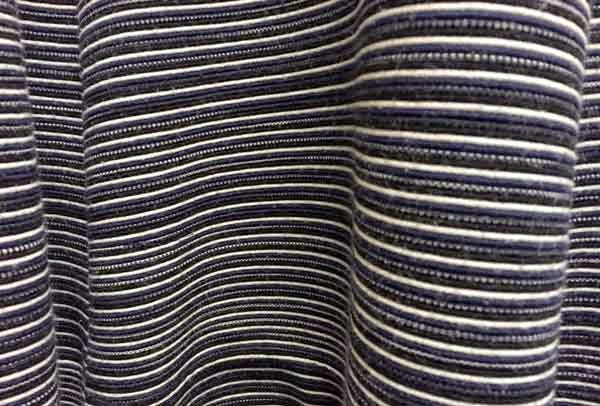 |
| Blue Dress Fabric |
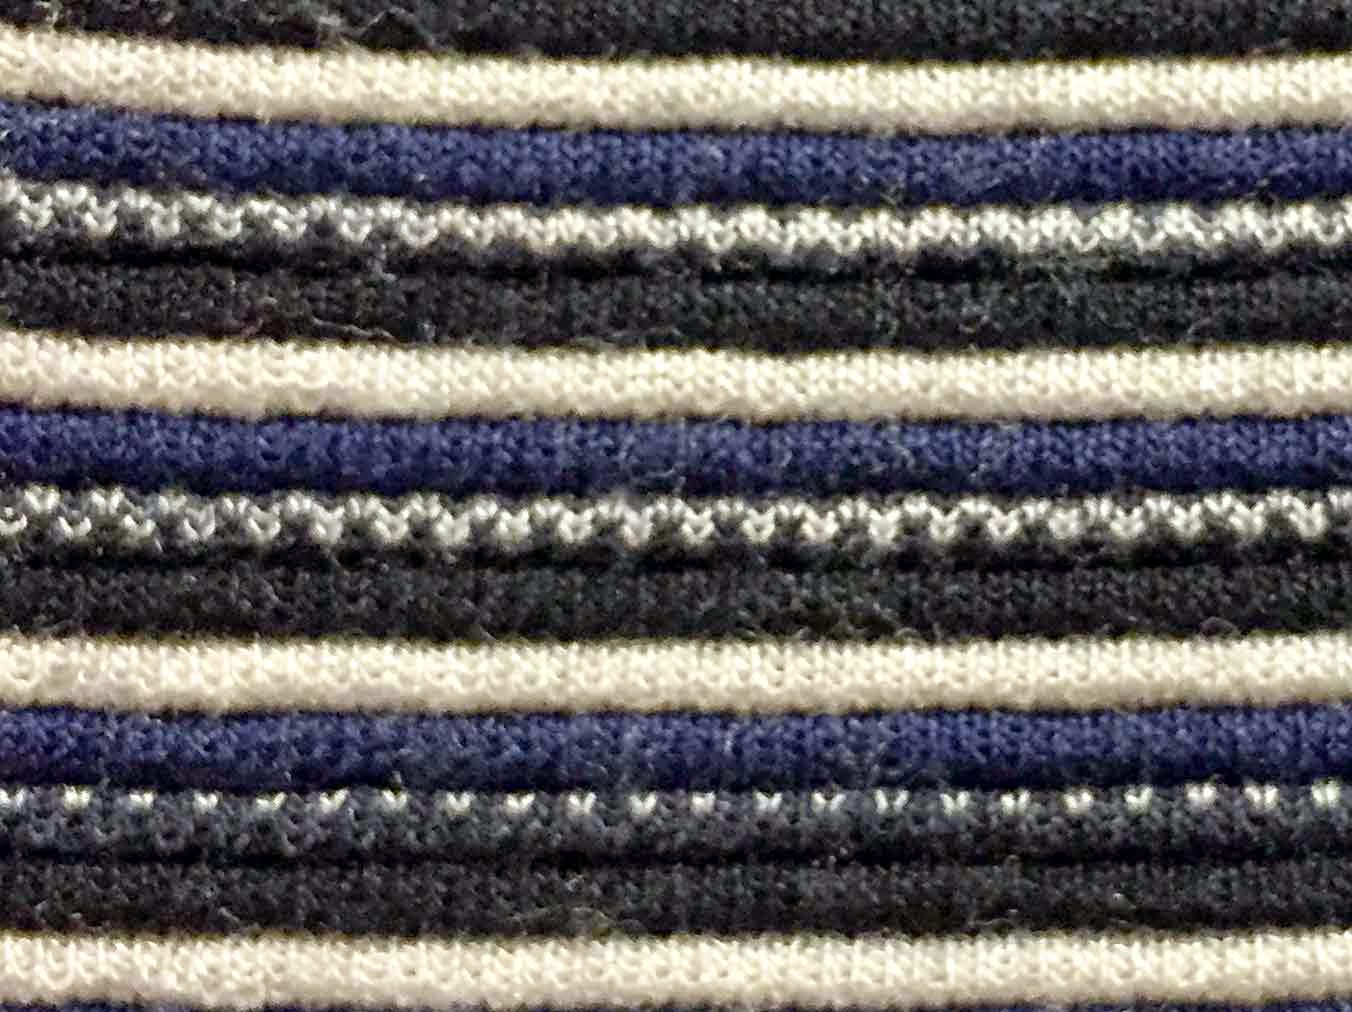 |
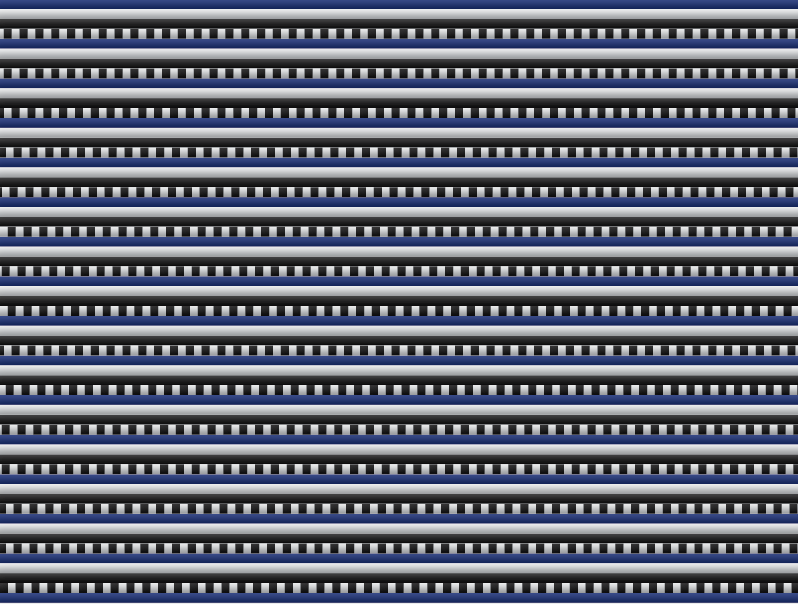
| Blue Dress Fabric: Close Up |
The first thing I noticed about the fabric was that was knitted in stripes:
1. White
2. Black
3. Two-tone: Black and White
4. Blue
The second thing I noticed about the fabric was that it was
jacquard knitting. Jacquard knitting is a complex type of multi-color knitting whereby the floats created by the color switches will be confined to the inside of the finished project. What that means to the person wearing the fabric is that the interior of the fabric doesn't snag when you wear or wash it. You'll see this technique used in those fancy knitted ski sweaters that cost a couple hundred dollars each. The cheap sweaters don't employ this technique because it's more complicated to produce. That's not going to affect how I recreate the pattern using PatternMaker; I just thought it was something interesting to note.
The third thing I noticed about the fabric was that it was
pin tucked, resting in subtle horizontal ridges along the width of the fabric. It makes each stripe puff up a little bit, so that even if the fabric was all in a single color, subtle horizontal ridges would still exist.
Believe it or not, we can create this pattern using only 5 objects! So let's recreate this pattern using PatternMaker!
1. Make a large rectangle and fill it with black lines using the following settings.
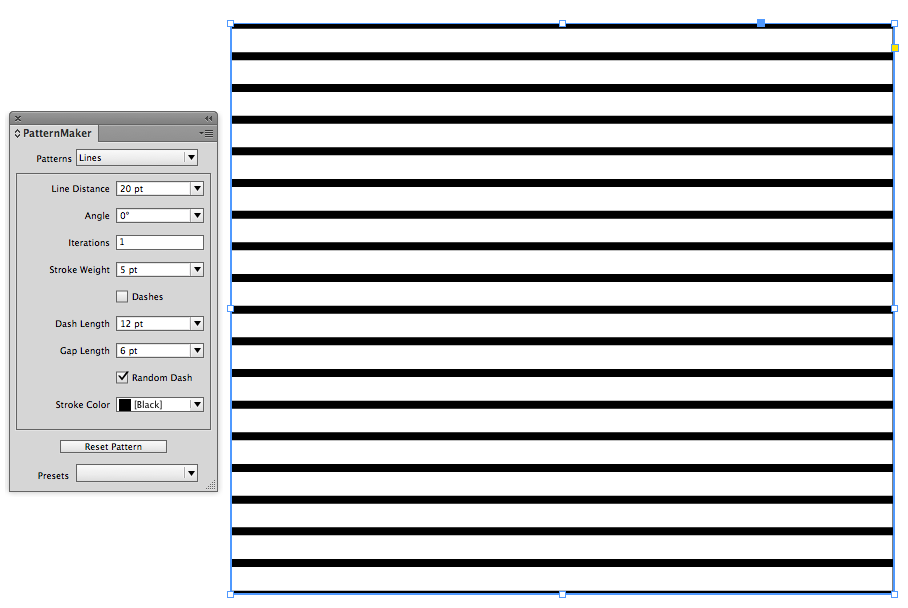 |
| Black PatternMaker Lines |
2. Set your ruler increments to Points. Now, keep in mind that the units used in PatternMaker are the same as whatever unit of measurement you have for the current document you're working in. I find PatternMaker
much easier to use if I am working in points. To quickly change your unit of measurement, Ctrl+Click in the top left corner of you ruler guides. Then choose Points.
3. Change your Cursor Key preference to 1 pt. Since we'll be reusing (and nudging) the black lines for the rest of the design, it's important to set the cursor key preference so that when we nudge, we'll get the exact alignment of the lines.
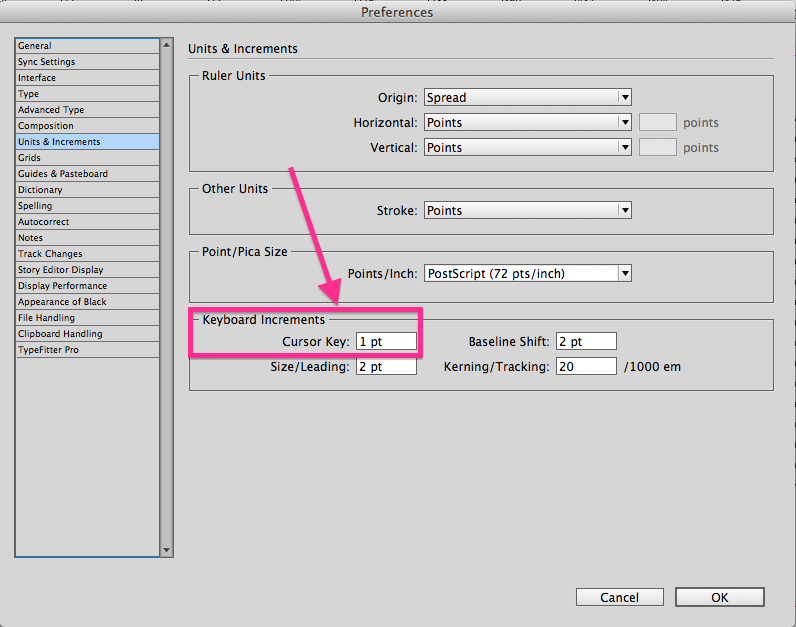 |
| Change Cursor Key Preference |
4. Add the Blue Lines: Select the Black Lines, then copy and paste in place. In PatternMaker, change the Pattern Stroke color to blue and then Shift+Up Arrow once. This will move the blue lines up 10 points. Because the line distance is exactly 20 points, that will put the blue lines exactly halfway in between the black lines.
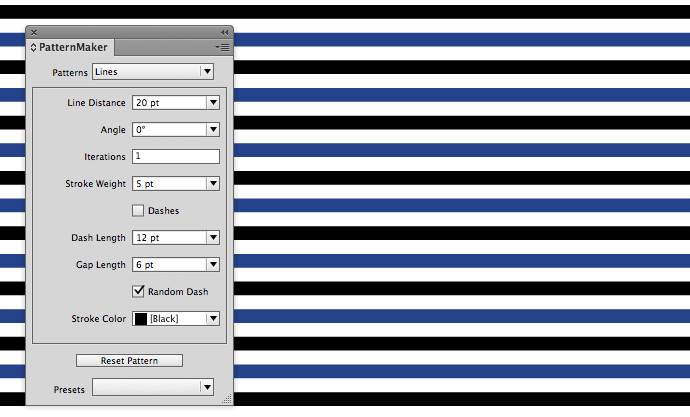 |
| Black and Blue Lines |
5. Add the White Line Placeholder: Since you already have the black lines pattern on your clipboard, simply Paste in Place again. Change the Pattern stroke color to magenta so you can see the pattern while you're aligning it. Press the up arrow five times.
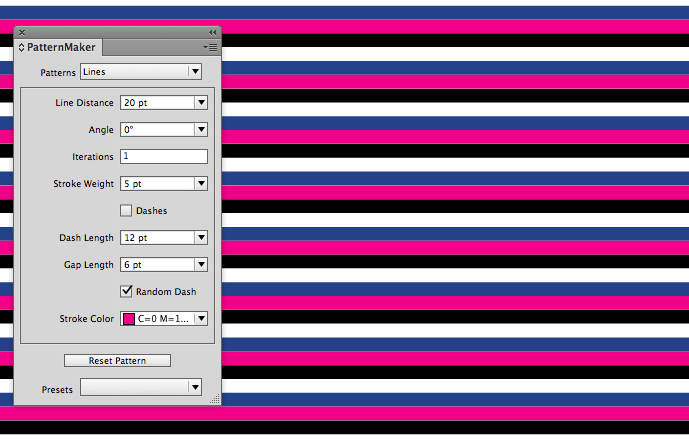 |
| Use Magenta to Align the Lines |
6. Duplicate the Magenta lines. Copy the magenta lines and and Paste in Place. Then Shift + Up Arrow once. These lines will be the placeholder for the white background two-tone lines we'll be creating next.
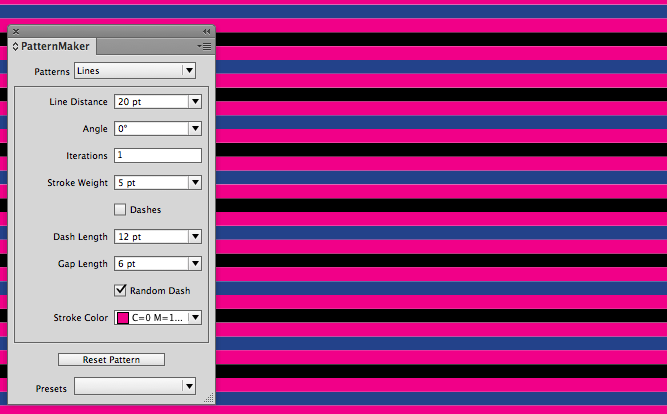 |
| Duplicate the Magenta Lines |
7. Rename your layers. If you look in the Layers panel, you'll see something similar to this. Those names come from how PatternMaker works. For every pattern you make, PatternMaker creates and embeds an EPS file into your InDesign document. Those embedded EPS filenames are what then get displayed in the Layers panel. But when all your patterns are created using the same type of shape (Lines, Triangles, Crosses, Dots, Waves, etc.), the names in the Layers panel aren't very helpful.
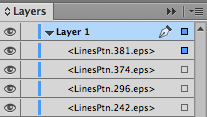 |
| Auto-Generated Confusing Layer Names |
So to make it easier to use the Layers panel to select the different frames, change the names in the Layers panel according to your colors, like so:
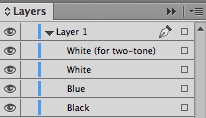 |
| Understandable Layer Names |
To change the names of your layers, click on the layer name, pause, then click again (a slow double click). The name will then highlight in blue and become and editable text field.
8. Change the magenta to white: In the Layers panel, Shift + Click on the little squares next to the two White layers. Then change the pattern stroke color to white.
9. Make the dashed line for the two tone. Select the top white lines pattern, then copy and paste in place. Change the line color to black and choose Dashes, Random Dashes, 4 pt Dash length and 4 pt Gap Length. The Random Dash is important because without it, the pattern will look like it has vertical stripes in it. Be sure to change the name of the layer in the Layers panel.
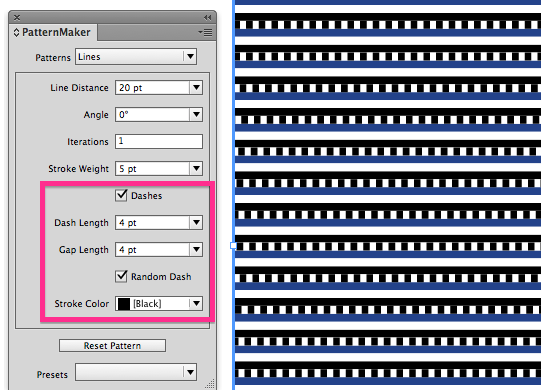 |
| Dashed Line for two-tone stripe |
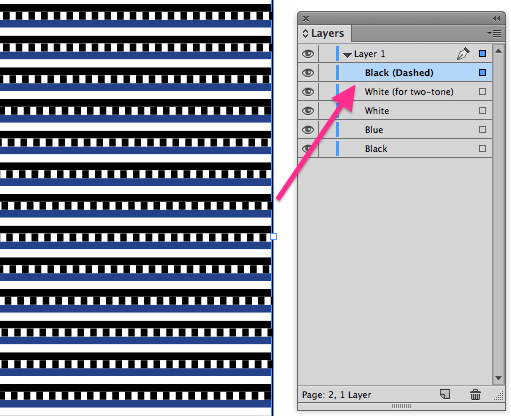 |
| Be Sure to Change to Layer Name |
10. Add bevel and emboss to simulate the pintuck. Use the the settings below.
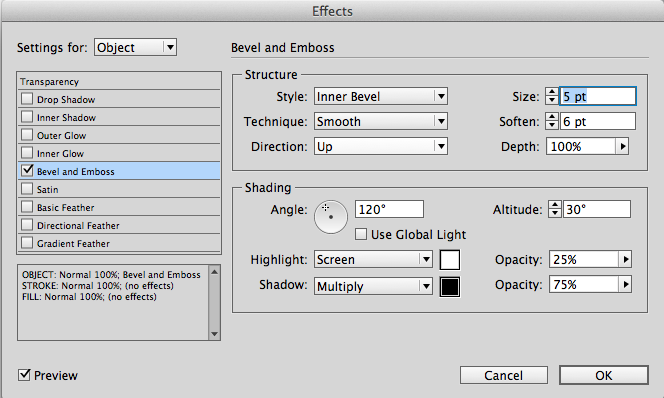 |
Bevel and Emboss Settings for Pintuck
|
 |
Completed Blue Dress Fabric Pattern
|
| Blue Dress Fabric |
|
While this recreation is not an exact replicate of the original blue dress fabric, it is an interesting study in what can be done with PatternMaker and just a few objects.
PatternMaker is a free download and come with 3 free patterns: Crosses, Lines, and Scallops. An additional pattern pack can be purchased as a subscription for $49/year.


