Showing posts with label Acrobat Stamps. Show all posts

Tuesday, September 26, 2017

Help Make Adobe Products Better with UserVoice!

Recently, Adobe has totally changed the way it handles feature requests and bug reports. They used to seemingly go into a black hole at Adobe, never to be be spoken of again. Even on the pre-release forums they were difficult to find. The engineers would say that few people gave them feedback, and the users who did provide feedback complained that Adobe was ignoring them.

But good news! Adobe has now made the feature requests and bug reports open to the public! You can easily search through other people's feature requests, add comments, and VOTE!

Here is an example of a feature request. Notice that there is a comment from one of the Adobe engineers, who has assigned a status to the feature. Notice that there are also 13 comments, and 18 votes. Once you vote for a feature request, you are given the option to subscribe to the topic and be notified whenever there is a new comment on the topic.


So I've compiled links to the feature requests of my favorite InDesign features (which I personally think are extremely neglected). Would you please take a few moments and VOTE for this features?

I will update this list as I see more features that I'm really passionate about.


InDesign Notes

InDesign Conditional Text

Acrobat Commenting


I love how Adobe is proactively seeking our feedback, and is providing a useful platform to do so. It is my understanding the David Blatner and Anne-Marie Concepcion (from InDesign Secrets) pioneered the idea of using User Voice for InDesign feature requests.

Please consider visiting the InDesign UserVoice site where you become an active part of making InDesign better. You can also visit the Acrobat UserVoice site here.


Edit: 9-13-918
If you need an easier way to create and manage annotations in your PDFs, check out my article on Bluebeam Revu. It's an amazing program designed specifically to meet the needs of users in Architecture, Engineering, and Construction. Specifically, read about the Toolchest, where you can store annotations that you use frequently. Revu has done an amazing job of listening to their users and building a tool to meet their needs.

Wednesday, August 23, 2017

Flattenizer Script for Adobe PDFs

Some years ago, Rick Borstein wrote a great article about how to flatten PDF comments. Adobe doesn't officially support this script. Running the script will essentially "burn" the comments into the PDF,  so they'll no longer be viewable in the comments pane, and they will be visible when the document is placed into InDesign.

At some point, Adobe removed the script from their site, but I keep seeing people ask for it on various Adobe forums. So here it is:

event.target.flattenPages();

I still use this regularly in Acrobat DC. I set it up as a custom command and added it to the Quick Tools bar. Apparently you can also do this same thing using a feature in Preflight, single fixups. But I think a one-click solution is easier.

Here are a couple of Adobe forum posts where people have been discussing this function:

Placing PDFs in InDesign
How to "flatten" a pdf in Adobe Acrobat X Pro

Tuesday, August 25, 2015

Repurposing Acrobat's Built-in Stamps

Did you know that Acrobat has a variety of built-in stamps? There are several stamp libraries, to serve basic office needs:

Standard Business Stamps
Sign Here Stamps
Dynamic Stamps
But recently, I needed a sign-here stamp with the arrow pointing to the right (instead of to the left). I wanted to use the same design as the original Sign Here stamp, so how to access the vector file?

I did a little digging and found where the stamps are hiding. These file paths are for the English language stamps, but the stamps for the other languages are located nearby.

Applications > Adobe Acrobat XI Pro > Contents > Built In > Comments.acroplugin > Stamps > ENU


The file path for Acrobat DC is: Applications > Adobe Acrobat > Contents > Plugin > Comments.acroplugin > Contents > Resources > Stamps > ENU

What's curious about the stamps in this folder is that there are some additional sets of stamps that Acrobat doesn't load. Take "Faces" for example. This was the very first set of stamps that I ever recall seeing. I think it was back in Acrobat 4. I remember thinking, "That's stupid! Why would anyone use stamps?"


What was Adobe thinking?

Faces Stamps
Also nearby are a few other stamp libraries.

Words Stamps

Pointer Stamps
So, how to repurpose these stamps? Simply open them in Illustrator. In this case, I have opened the SignHere.pdf stamp file in Illustrator. Because this file was made many years ago (before Illustrator had art boards), you'll be asked to choose which page you want to open.


Next, select the red arrow and reflect it.
Then, scoot the arrow into place.
Save the file with a new name and go back to Acrobat.


Now we'll make a custom stamp. Go to Comments > Stamp Tool > Custom Stamps > Create Custom Stamp. Then navigate to the PDF you just made.


In a previous post, I thought that you first had to crop the page size in order for the custom stamp to work properly. But I was wrong. Acrobat will use the artwork dimensions (as opposed to the artboard dimensions).

From the Category drop down menu, choose "Sign Here." Give your stamp a name, then click OK.


Now, your right-pointing Sign Here stamp is added to the Sign Here stamp Library!


Thursday, January 29, 2015

Use Powerpoint to Make Patterned Stamps for Engineering Drawings

This is the second of my 2-part series about how to make patterned stamps for engineering drawings. The first article was how to accomplish the same task using Illustrator:  Using Illustrator to Make Patterned Stamps for Engineering Drawings. This series was prompted by an excellent question from my neighbor, a nuclear engineer:
"I am marking up a drawing and created an octagon shape. I wanted to fill it in with a pattern – where can I find patterns? I thought I used this before but can’t seem to find it.
I decided to make some custom stamps for him using Adobe Illustrator, but I wanted a way for him to be able to make his own stamps to suit his particular needs.

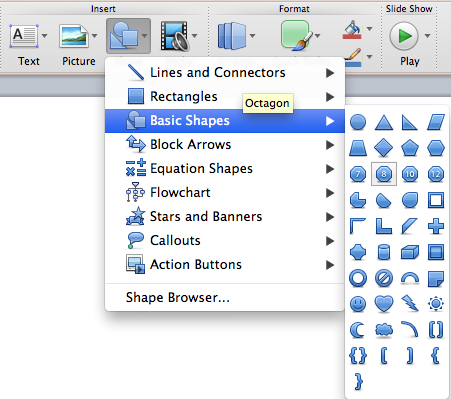
For a short period of time many years ago, I worked at an engineering firm in the marketing department. Part of my job was to create powerpoint presentations. I actually had to recreate many of the graphics I had made in Illustrator, using the drawing tools available to me in powerpoint. The drawing experience was not as elegant as using Illustrator, but it proved valuable because I learned that, in a pinch, powerpoint has some decent drawing tools available. There are a good sized collection of basic shapes to choose from. These screenshots are from Office for Mac 2011, but I imagine all versions of powerpoint have these shapes as well.

Powerpoint Basic Shapes
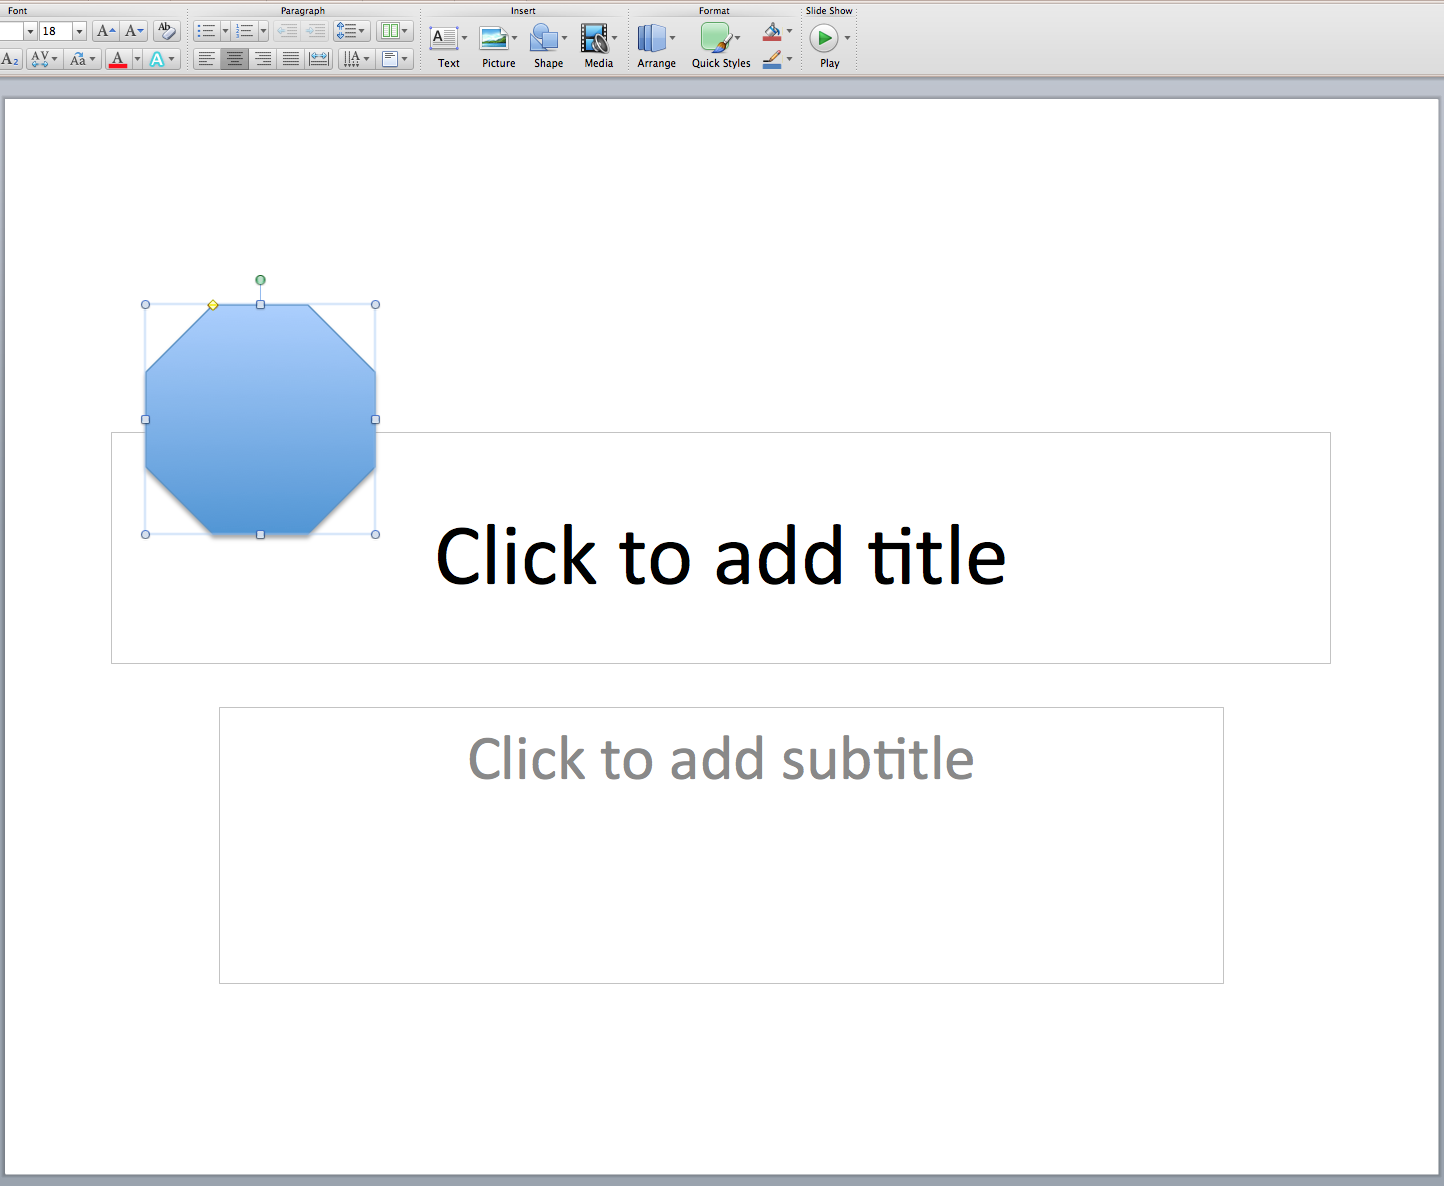
Go to: Insert > Basic Shapes > Octagon. Now you can draw the octagon on your page. I only needed a small octagon, so mine doesn't take up much room. Now, keep in mind that powerpoint will let you draw the octagon in whatever proportion you desire, so if you want to draw a perfectly symmetrical octagon, hold down the Shift key as you drag. That will constrain the proportions.

An Octagon as a basic Shape in a Powerpoint document
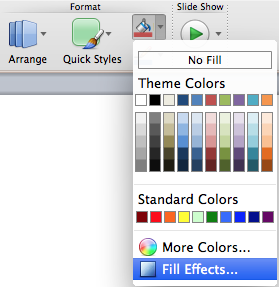
Next we need to edit the color and pattern of the shape. Go to Fill Effects and click on the paint bucket icon. This will let you edit all sorts of things about the shape, not just the Fill (as one might presume by the name "Fill Effects").

Powerpoint Fill Effects
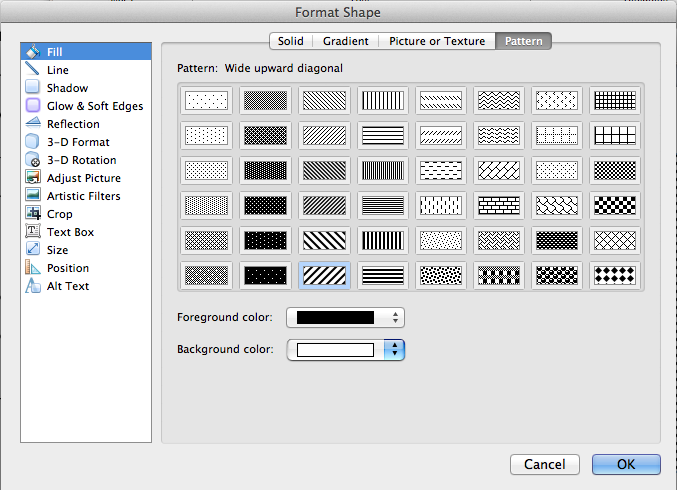
First change the fill color from blue to a pattern. Go to Fill > Pattern tab.

Fill Patterns
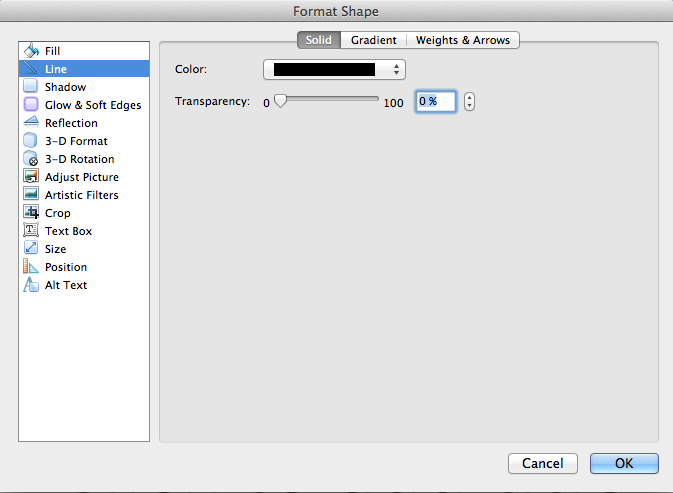
Next change the line (stroke) color from blue to black.

Line Color
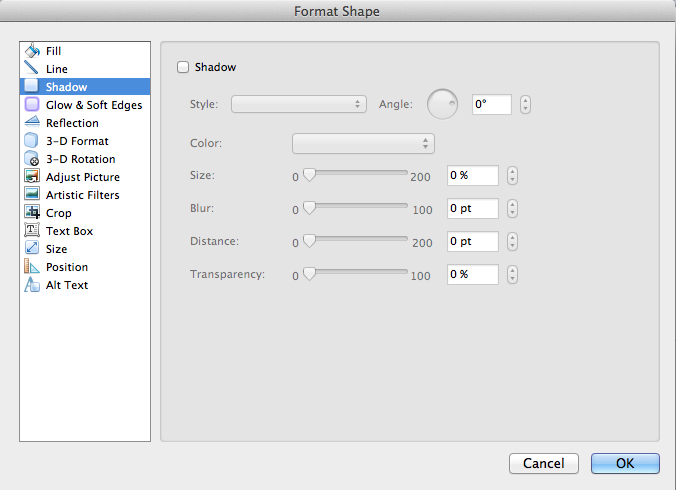
 Finally, remove the drop shadow by unchecking "Shadow."

Shadow
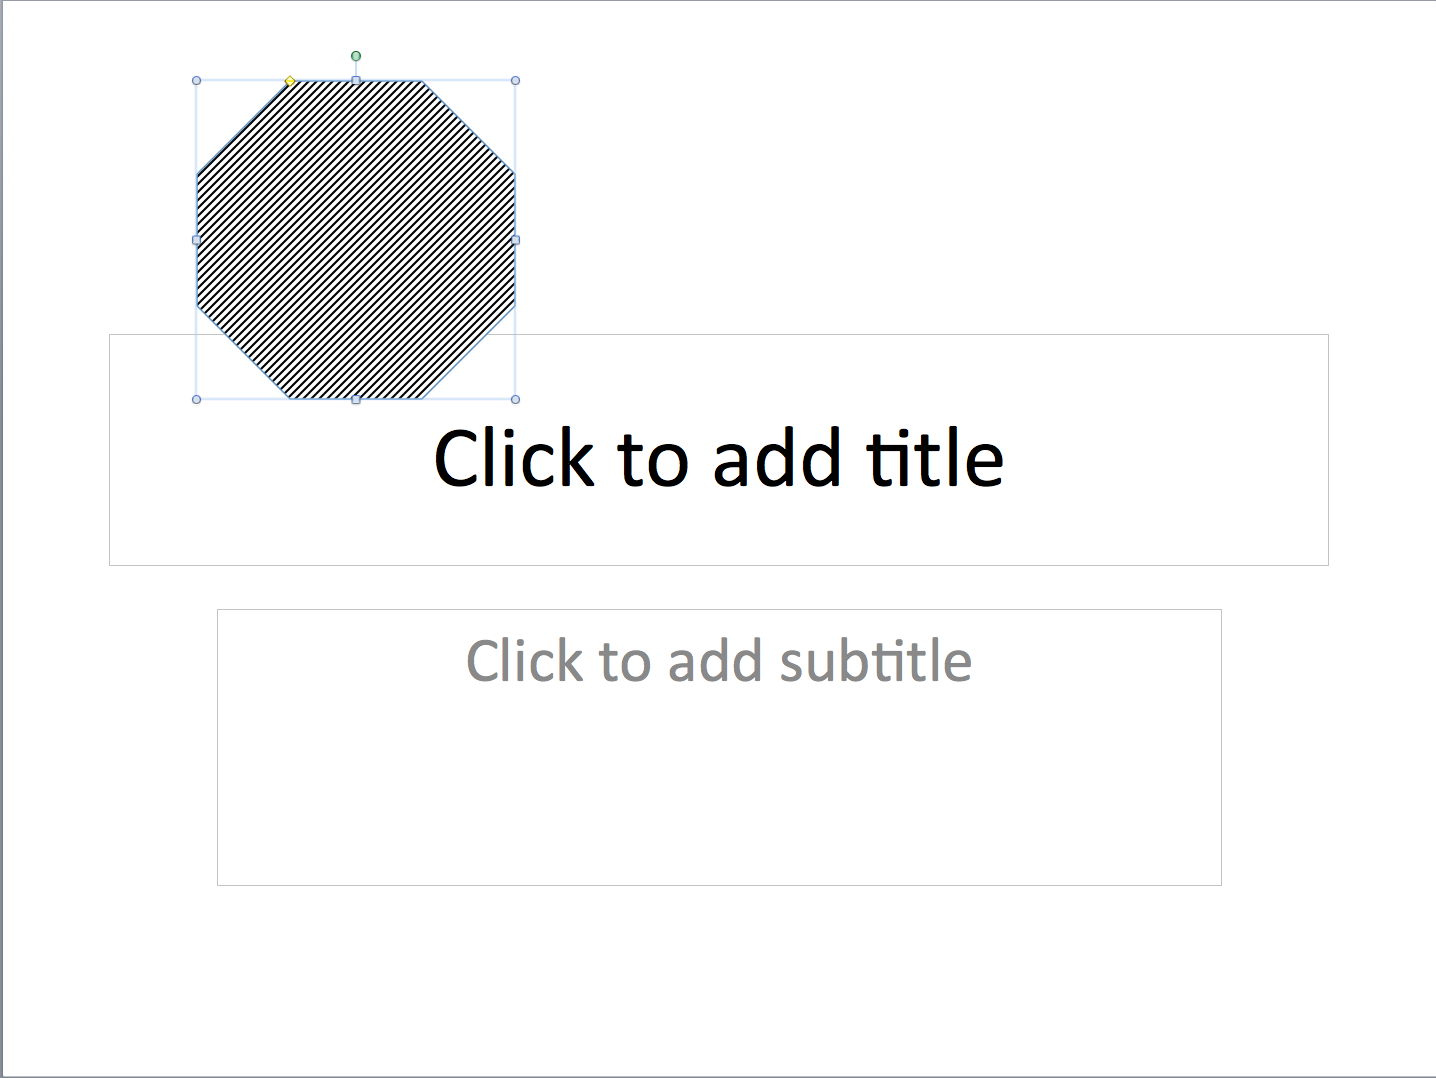
Now your slide should look something like this:

Patterned Octagon on a Powerpoint Slide

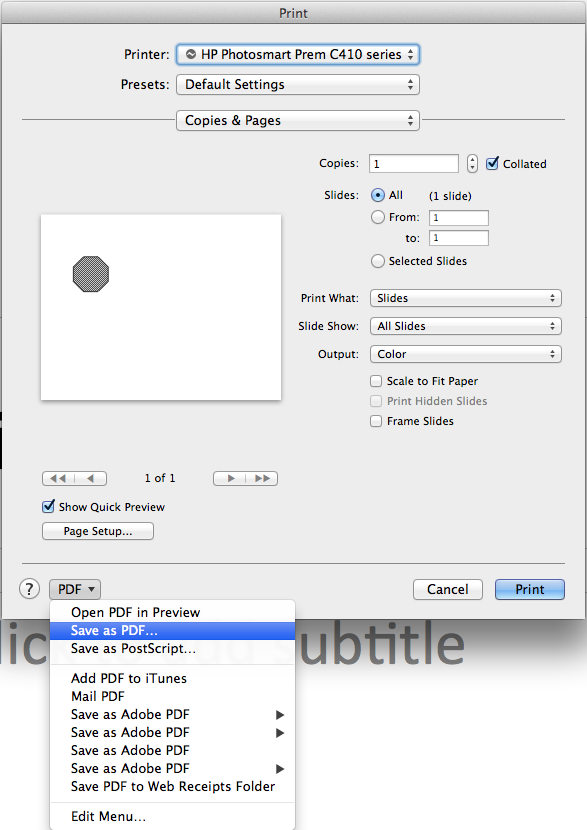
Next, you'll need to create a PDF. Your method may be slightly different (since I am on a mac), but here is how I make a PDF from powerpoint: Go to File > Print and from the PDF button in the lower right, choose "Save as PDF." Save the PDF in a convenient place and be sure to remember what you named it.

Save as PDF
Next, go into Acrobat (not Adobe Reader) and open the PDF you just made. Now we're going to crop the page. If you're not in the printing or design industry, there is a good chance you never knew Acrobat could edit page size. It's a little secrets among printers and designers that Acrobat is capable of editing PDFs in ways that Office users could only dream of. So next go to Tools > Print Production.

Tools > Print Production
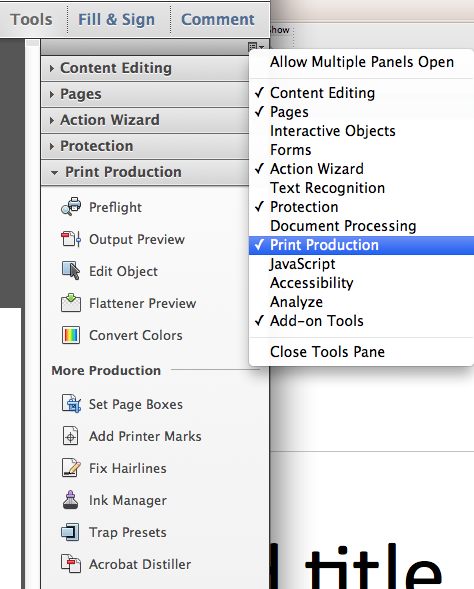
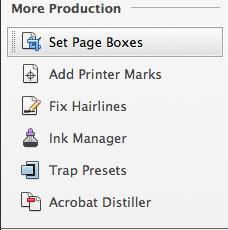
Now, if you don't have Print Production in your list of tools, fear not. Just click on the little "Icon in the top right corner of the Tools panel. It will display a drop down of all the different tools available. Now choose "Set Page Boxes."

Set Page Boxes
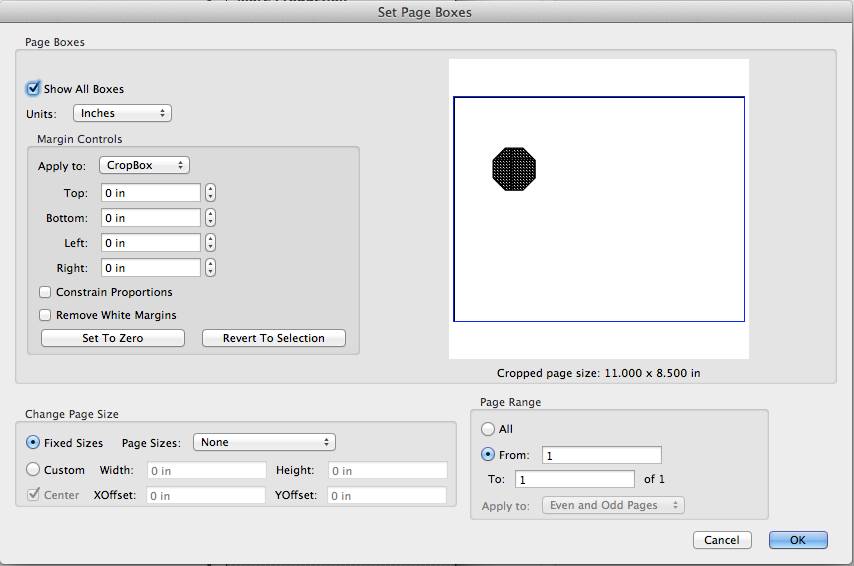
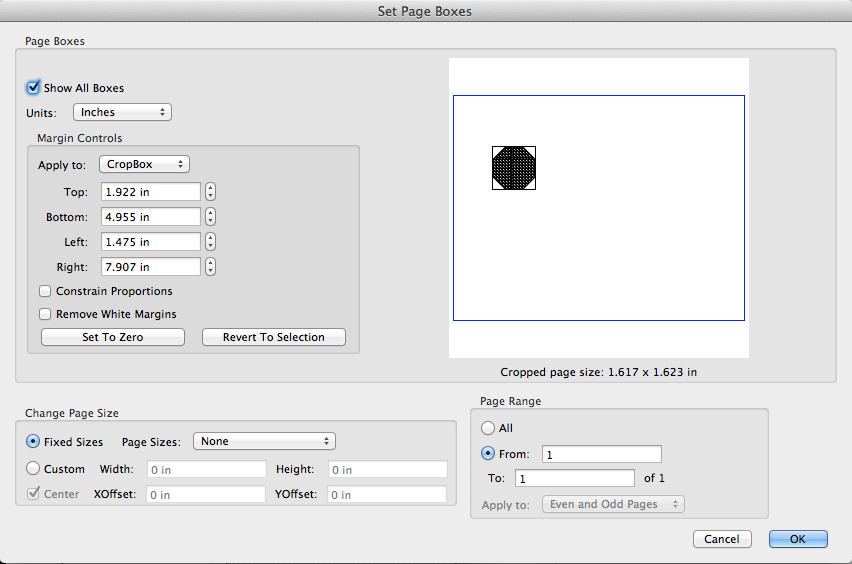
That will bring up this screen. Now, if you happen to know the exact amount you should crop, or if you want to set your page to a particular known size, this dialog box is great for that. But for your purposes today, it's not very useful. You see, I don't know where exactly my octagon is placed on the page, and I don't know exactly how big it is. What I really what is a way to just draw a box around the octagon and crop to that. So Press Cancel.

Set Page Boxes UI
Next, press C. That will change your cursor from a hand into crosshairs. This is a hidden feature of Acrobat XI. Years ago, I think that the Crop tool was a separate tool, and you could use it without having to go into a dialog box first. Fortunately for me, the shortcut for the Crop tool is the same as it is in Photoshop. So zoom in close to the Octagon (Cmd/Ctrl +) and draw a marquee around your octagon.
  
Crop Boundaries
Now press Enter/Return. That will bring up the Set Pages dialog box, but this time, the fields will be pre-populated!

Set Page Boxes with fields Pre-populated
Now see how the PDF page size has changed? Note: hover over the lower left corner of the gray area in Acrobat and it will temporally display the page size.

Now your patterned octagon is reay for use as a custom stamp. Go to Using Illustrator to Make Patterned Stamps for Engineering Drawings and start with Step 7: Create a Custom Stamp.

Edit: 9-13-918
If you need an easier way to create and manage stamp annotations in your PDF, check out my article on Bluebeam Revu. It's an amazing program designed specifically to meet the needs of users in Architecture, Engineering, and Construction. Specifically, read about the Toolchest, where you can store annotations that you use frequently.

Saturday, January 24, 2015

Using Illustrator to Make Patterned Stamps for Engineering Drawings

I was recently asked an excellent question by my neighbor, a nuclear engineer:
"I am marking up a drawing and created an octagon shape. I wanted to fill it in with a pattern – where can I find patterns? I thought I used this before but can’t seem to find it.
While Acrobat does indeed have some built-in stamps, they're very generic, and not appropriate for what my neighbor needed to accomplish.

Standard Business Stamps
Sign Here Stamps
Dynamic Stamps
After a little discussion, I decided to go ahead and make him a pattern-filled object in Illustrator, which he could then import into Acrobat as a custom PDF stamp. While this was a good short-term solution, I thought it would good to figure out a solution that would let him make his own custom stamps, in whatever shape and color he needed.

But first let me show you how I made him the stamps in Illustrator. Start with a new document in Illustrator.

1. First, start with some pattern swatches. Unbeknownst to many Illustrator users, Illustrator has a bunch of built-in patterns. You can find them with the swatches here:
Windows> Swatches > Patterns > Basic Graphics > Basic Graphics_Lines

Basic Graphics: Lines
Side note: by clicking on the little triangles at the bottom left of the panel, you can easily move from one built-in swatch library to another.

Basic Graphics: Dots
Basic Graphics: Textures
But I digress, let's go back to making our pattern-filled Octagon.

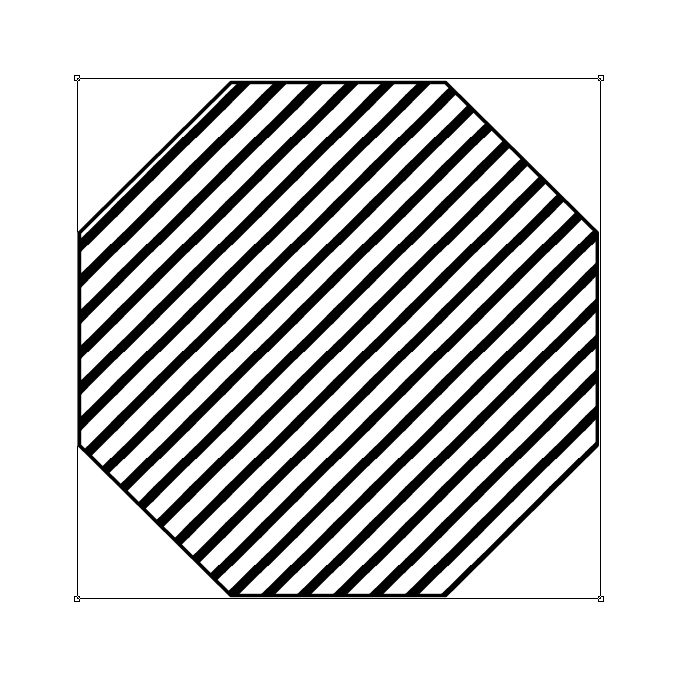
2. Next, make an octagon and give it a stroke and a pattern fill. I chose one of Illustrator's built-in pattern swatches from Basic Graphics_Lines. 


3. Make the lines go diagonal. Now, you'll notice that the lines in Illustrator's default Lines swatches are all either going horizontal or vertical. But my engineer friend wanted the lines to be going diagonally. To do this, go to Window > Transform to bring up the Transform Panel. On the panel flyout menu, choose Transform Pattern Only.

Transform Pattern Only

Now, the "Transform Pattern Only" command is confusing because there are a couple of things they don't tell you in that little panel flyout menu. The first can be seen when you hover over the little yellow warning triangle that now appears in the Transom panel: "Transformations will only be applied to the pattern fill of the selected object(s)."

We only see that warning by hovering over the little yellow triangle. Now, if you go and try to then transform the pattern, as I did, using the rotate tool, both the object and the pattern are transformed. That's not what I wanted!


Both Object and Pattern have been rotated


After a little experimentation I figured out that the only way to get just the pattern to rotate is by using the Rotate and Shear fields within the Transform Panel.


4. Make your artboard the same size as your object. Go to Object > Artboards > Fit to Selected Art. This will make the stamp import properly into Acrobat's Custom Stamp created.


5. Save as an Illustrator PDF.

6. Go to Acrobat and open a PDF.

7. Create a Custom Stamp. Go to Comments > Annotations > Click on the Stamp tool > Custom Stamps > Create Custom Stamp.


8. Select Image for Custom Stamp. Navigate to the PDF you just made.


9. Give the stamp a category and a name. Now your stamps ready for use.


10. To use the stamp, click not the stamp tool and choose your new stamp from the list.


11. To use the stamp repeatedly, right-click on the stamp tool ann choose "Keep Tool Selected."


12. Now start stamping. You can stamp at different sizes. Acrobat does not allow for disproportionate resizing of stamps, so you can click and drag without fear of changing the proportions of your stamp. If you like, you can even change the opacity of your stamp using the Properties toolbar (Cmd+E).


13. Make some more options. I figured since one texture is good, more textures would be even better. So I went back to Illustrator and made a few more artboards and applied different patterns. You can download the patterned octagons here.


To learn how to make these damps in Powerpoint, see part 2 of this series: Use Powerpoint to Make Patterned Stamps for Engineering Drawings.


Edit: 9-13-918
If you need an easier way to create and manage stamp annotations in your PDF, check out my article on Bluebeam Revu. It's an amazing program designed specifically to meet the needs of users in Architecture, Engineering, and Construction. Specifically, read about the Toolchest, where you can store annotations that you use frequently.

Thursday, August 15, 2013

Beware Stacked Transparency in PDF Files Across Long Documents

I recently encountered a PDF export problem that plagued me for months. I was trying to export a book containing roughly 50 InDesign documents. The last 25 or so documents contained scanned engineering drawings placed as graphics into the InDesign documents. When I tried to export a PDF from the InDesign book file, the PDF would seemingly be exporting just fine… until InDesign reached pages with some of those scanned images. Then it seemed to randomly hang. Fortunately, I finally found the source of the problem, as well as a fix.


Read the entire article at InDesign Secrets:

http://indesignsecrets.com/beware-stacked-transparency-matter-source.php