I was chatting with my sister recently about family Christmas traditions. As her children are growing older, she wanted to incorporate some of our family Christmas traditions into her own family. We both got to thinking about it, and the tradition that first came to mind was the annual documentation of the Christmas ornaments. What is that you ask? Well, in my family growing up, we would document all of our Christmas ornaments every year:
- Ornament description (What)
- Who they were from
- Year added to the collection (When)
I thought this practice was perfectly normal and something that every family did. When I was older, I learned that was unique to our family. It was something my mother started; perhaps simply to prevent us from inadvertently discarding ornaments still hung in the dried-out tee before we hauled it to the dump. Whatever the reason, we documented our ornaments faithfully every year. At some point in time, we had even typed up a digital copy of the list, and it was kept safely on a 5" floppy disk.
At the close of each Christmas season, we would wrap each ornament individually in paper towels or large dinner napkins. So when December rolled around again the following year, we would each get out our designated box of ornaments and start unwrapping them. It was always so exciting to see what was hidden inside each paper towel. It was like unwrapping 100 Christmas presents! My sister and I would each have our favorites, and as we were decorating, we'd talk about where we got them, who made them for us, and why we liked them.
Our favorite ornaments were the hand-made ones. We had made quite a few ornaments in girl scouts. We had messy glitter snowmen, macaroni angels, and clothespin clowns. Sometimes, we'd have to do a little repair work on the ornaments, as they began to show signs of wear. Each year brought another one or two ornaments into the collection.
 |
| Clothespin Clown, Angel, and Soldier, Mid 1980s |
 |
| Macaroni Angel, Mid 1980s |
 |
| Paper Stocking, Made in Preschool, Early 1980s |
 |
| Clothespin Reindeer, Made in Girl Scouts, Mid 1980s |
 |
| Felt Sequin Stocking with Bear, made by my sister Kim, Mid 1980s |
As a child, I didn't realize that people would put gifts in stockings. I thought they were just supposed to be decorative. I think this was because our stockings were made of a non-strecthable material and were quite narrow. My childhood stocking (made by my mother) now hangs on the tree.
 |
| My childhood Christmas Stocking, from my mom |
Mom had a short lived crafting career, but she did make me a few ornaments before leaving the sequins to Grandma.
 |
Brown Felt Bear with Sequins, Mom
 |
| Sequin Snowman with Hat and Scarf, Mom |
|
After I got married, Steve brought along a few of his childhood ornaments as well.
 |
| Red Apple with Glitter "Steve" |
There are some ornaments that aren't really ornaments at all, but somehow they ended up in the Ornament Box and so every year we would stick them in the tree. This Santa Snow Globe has definitely seen better days.
 |
| Santa Snow Globe |
We had a fair number of livestock ornaments, mostly sheep. One could speculate that sheep were part of the nativity scene, but our affinity for sheep ornaments ran quite a bit deeper that than. We were a 4H and FFA family, which meant that we not only loved livestock, we
owned livestock, and we even had a small scale sheep-breeding operation in our backyard. Our annual family vacation was spending a week (often two) camping at the county fair, where we would show our animals. So yes, of course, we would have sheep ornaments, and plenty of them. I'm also an avid knitter, and even tried spinning for awhile, so I still have a soft spot in my heart for sheep (even though I no longer choose to own them). And so, the sheep ornament collection keeps growing.
 |
| Suffolk Sheep on a Rake, Mid 1980s |
 |
| Santa Sheep, Mid 1980s |
 |
| Brown Sheep, 2013 |
At around the age of ten or eleven, we took a trip to San Diego and stopped by the fancy Christmas store in the mall. That's when I was first introduced to the the elegantly mass produced ornaments sold there. No handmade stuff here! All imported from the far east by the cargo ship load!
 |
| Fancy Ornaments from the Mall, mid-late 1980s |
Sometimes the ornaments would come in sets. We usually grouped those together on the list. My sister had a very smiler set of ceramic Raggedy Ann/Andys, so in order to keep them straight, my mom wrote our names on the back of our Raggedy Andys.
 |
| Ceramic Raggedy Ann and Andy, Mom bought from a Craft Show |
 |
| Miniature Pillows, from Jennifer and Troy Schaublin |
 |
| Miniature Wooden Angel, Bear, and Santa |
Some of the ornaments are obviously handmade, though I can't recall by whom. They don't have the detail that was always present in my grandmother's sequin ornaments.
 |
| Crocheted Stocking |
 |
| Floppy Gingerbread Man, Aunt Marie |
 |
| Orange Cardboard Mouse, Baby Gift given near the time of my birth |
A number of the ornaments have dates on them, usually written in black marker. Sometimes the date is so faint that it's tough to read (see Crazy Santa, below). Sometimes the date is imprinted on the ornament or perhaps even part of the design. Though my master list of the ornaments is long gone, it's neat to see when certain ornaments were given to me. Take this wooden plaque for example. It was from the Christmas of 1976. But I wasn't even born until
four months later. Someone gave me this gift when I was still in utero!
 |
| Wooden Plaque, from Jennifer and Troy Schaublin, 1976 |
 |
| Popsicle Stick Skier, 1978 |
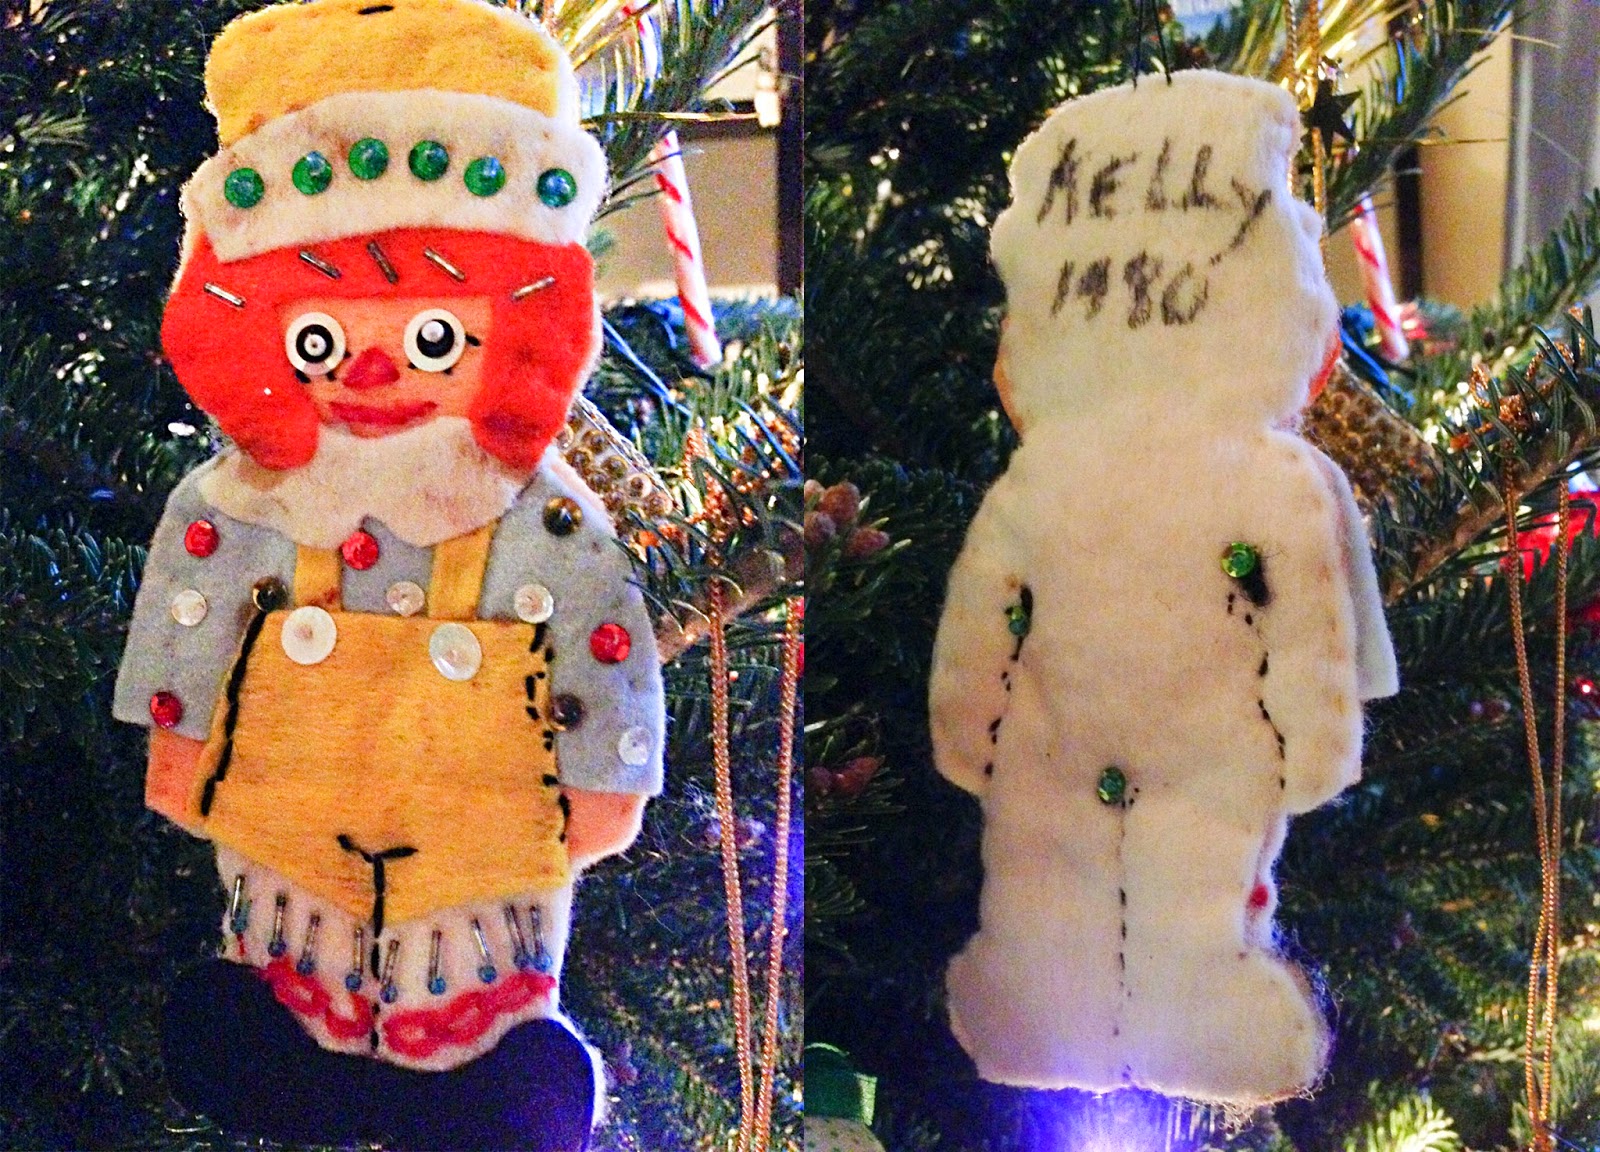 |
| Sequin Raggedy Andy, Grandma Ewing, 1980 |
 |
| Crazy Santa, from Mom, 1980 |
 |
| Sequin Santa, Grandma Ewing, 1979 |
 |
| Ceramic Christmas Animal Bells, 1986 |
 |
| Arrow Coffeehouse Scroll Woodworking, from Trevor and Erica, 2013 |
Sometimes the ornaments were from special trips, or during very special times in our life. We went to Hawaii the summer between fifth and sixth grade, and I got a Christmas ornament while we were there.
 |
| Hula Doll, 1987 |
In 2009, my husband and I started our marine publishing business, and I found a crystal yacht ornament on ebay to commemorate that year. For years, I had prayed to God asking for a secure job and a way for us to reliably support ourselves. And He answered. God had prepared a ready-made publishing business for us. 2009 was the start of something new!
 |
| Crystal Yacht, 2009 |
While we loved all the ornaments, there were some that held a special place in our hearts; those were the ones my grandmother had made. She was very crafty, had grown up during the depression, and for nearly two decades, we each received one or two ornaments that she had made by hand. In fact, every single year, she made ornaments for each of her ten grandchildren, for at least two decades. She made us glittery silk balls, sequined snowmen, crocheted snowflakes, and plastic canvas bird feeders, (complete with birdseed). I mentioned it to my grandfather recently (he turned 91 this year), and he told me that she would order kits from Lee Wards. I was able to track down a Lee Wards catalog for sale on Etsy. I remember some of these exact ornaments hanging from my childhood tree.
Grandma's ornaments went through phases. For several years, we ornaments made of felt, with a few sequins. Then for a couple years we got plastic canvas ornaments. Then, Grandma moved into a sequined-ball phase for a few years. The last ornament I got from her was the crocheted snowflake.
 |
| Clear and Silve Bead Snowflake, Grandma Ewing, Mid 1980s |
 |
| Gold Sequin and Tin Foil Pyramid, Grandma Ewing, Mid 1980s |
 |
| Green Sequin Rocking Horse, Grandma Ewing, Mid 1980s |
 |
| White Plastic Bell with Gold Sequins and Green Beads, Grandma Ewing |
 |
| Knitted Snowman, Grandma Ewing |
 |
| Pearl Diamond, Grandma Ewing |
 |
| Green Plastic Canvas NOEL Bear in a Box, Grandma Ewing |
 |
| Green Plastic Canvas Bird Feeder, Grandma Ewing |
 |
| Red, White and Green Sequin Ball, Grandma Ewing |
 |
| Red Sequin Bell Pillow, Grandma Ewing |
 |
| Red and Gold Sequin Styrofoam Bell, with Red Ribbon, Grandma Ewing |
 |
| Red Silk Ball with Gold Flower and Green Beads, Grandma Ewing |
 |
| Silver Star Sequin Tree, Grandma Ewing |
 |
Crochet Snowflake Grandma Ewing, late 1980s
|
Grandma Ewing passed away in November of this year. I owe her a debt of gratitude, as she taught me how to knit. I am sure my knitting and crochet aptitudes come in large part from her.
As a child, my introduction to documentation came in the form of something fun: an annual Christmas tradition. We documented our Christmas ornaments because my mother decided it was important to keep track of them. I'm not sure if she instituted this practice because she wanted me to fall in love with record-keeping (I doubt it), but it helped to instill in me the importance of keeping an organized list of something that I cared about. We documented the ornaments because it mattered: it mattered who gave them to us, what they looked like, and when we received them. It all mattered.
As an adult, I still love documentation. I make a good living at, in fact. I write about boats:
what equipment they contain,
how they were built, and
when to do scheduled maintenance. As a child, I was the end user of my documentation. But now as an adult, my documentation is for someone other than myself. The tradition of documentation that I learned as a child helped to prepare me for my eventual career.
I encourage you to start a new tradition with your family: documenting the Christmas ornaments.
Click here to download a ready-made template.
Merry Christmas!


