Sunday, April 27, 2014

Help! Where is the Marquee Zoom in Acrobat?

In older versions of Acrobat (version 9 and below), we used to be able to click on the handy marquee zoom tool in the toolbar. I think it may have even been up there by default.

Marquee Zoom docked into Toolbar in Acrobat 9

But like so many other tools, the marquee zoom get moved in Acrobat X and XI. My first thought was that it would be in the Tools pane. But nope!


So how about in the Tool Sets? Nope, not there either.


What about View > Tools? Again, no. That just displays the same list of tools as the Tools Pane.


I also thought "Create New Tool Set" might let me dock the marquee zoom, but once again, nope! 


The Tools in this list seem to be more of functions (things you want to accomplish) rather than tools as we designers would normally think of them. They are a duplicate of what tools are listed in the Tools pane.


What about View > Zoom? Well, that shows the tool I want, but I really don't want to have to navigate through the menus every time I need to use the marquee zoom. I'm really just looking for a way to get the marquee zoom docked into my toolbar.


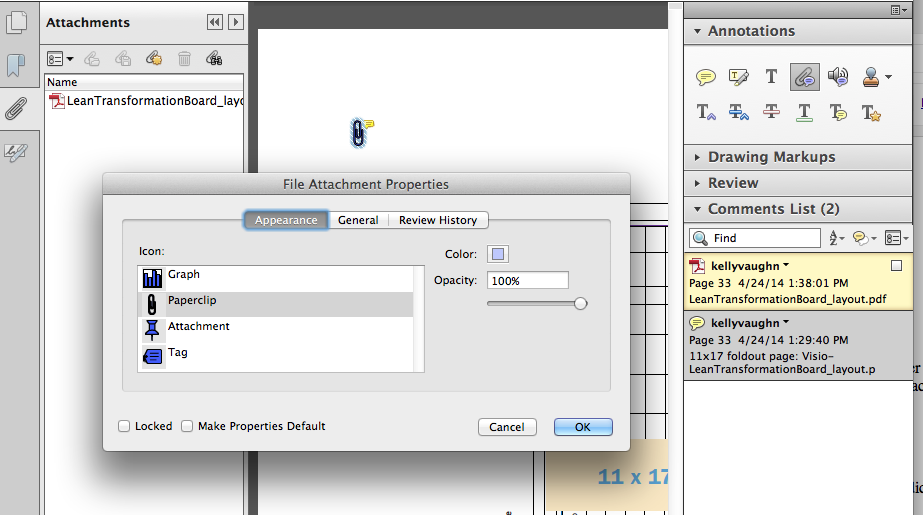
Apparently, the marquee zoom did not get grouped with all the other tools. Rather, it is classified as a "Toolbar Item," whatever that means... And if you want to show it, you have to go digging through four levels of menus. Seriously? No wonder I couldn't find this for over two years.


I have to ask: wouldn't a Toolbar Item also be considered a tool? Apparently not in Acrobat... Nevertheless, I now have my precious and oft-used marquee zoom out in the open where I can actually get to it.

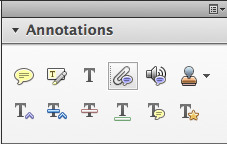
Marquee Zoom docked into Toolbar in Acrobat XI!

Edit: 9-13-918
If you need an easier way to access your tools, check out my article on Bluebeam Revu. It's an amazing program designed specifically to meet the needs of users in Architecture, Engineering, and Construction. Their tools are all module based and so much easier to find! The UI is totally (truly) customizable.

Friday, April 25, 2014

Relinking Graphics: Tired of Navigating to the the Original Link Folder? Fix it!

Do you often have to relink images in your InDesign documents, only to have InDesign point you to a folder from an entirely different project or client? Then you have to go navigating through your hard drive, looking for the correct links folder? Well, be frustrated no more!

This article can be found at InDesign Secrets.

Thursday, April 24, 2014

An Easier Way to Do an 11x17 Foldout Page

Lately, I've been working on training manuals. The manuals are printed on standard 8.x5 x 11" paper, 3-hole drilled, and placed into a binder. But sometimes, there is an 11x17 foldout page. While InDesign allows for mixed page sizes in a single document, it gets complicated (easily messed up) when the content of all the pages flows together in one story. I've come up with a fairly fool proof solution to this problem. It involves creates the entire document as 8.5 x 11 and using Acrobat to attach the 11x17 file.

1. Make a empty page in your InDesign document. It should be part of the threaded story.


Empty Page with a threaded frame


2. Create an 8.5 x 11 graphic frame and make it anchored into this empty frame. Set the Anchored Object settings according to the graphic below.


Graphic Frame Anchored into the Text Frame
Anchored Object Settings for a full page centered graphic

3. Place the 11x17 foldout page as a graphic into the graphic frame you just made.


4. Add a big yellow text frame indicating what this page is for.

Be sure to anchor this text frame into the same place as you anchored the graphic frame. You may need to scoot the graphic frame out of the way for a moment in order to anchor the yellow frame.


5. I also like to add an InDesign Note indicating what is supposed to happen with this page.

I use a plugin called PDF Stickies. It converts my InDesign Notes into PDF sticky notes. I wrote an article about how to use that plugin here. The important thing to do here is to type in the filename of the 11x17 foldout graphic that needs to go here in the final printed piece.


6. Add a blank page after the one you've just made.

Then, using the story editor, copy and paste the contents from the right facing page to the left facing blank page you just added.


7. Change the text to indicate that this is the backside of the 11x17 page. 

This serves to keep your page numbering correct upon final output.


8. Export the PDF.

Note: in order to get the PDF Stickies plugin to export the stickies to a Print PDF, you need to add the InDesign document to a book and then export from there.

9. Open the file in Acrobat and go to the Comments pane. Also open up the Annotations twirl down.


10. In the Comments List, you'll find the name of the 11x17 graphic that the printer will be printing full size and inserting here. Copy that filename.


11. In the Annotations twirl down, click on the little paperclip icon.


Attach File

12. When Acrobat asks you what file to attach, paste the filename you just copied into the search field.


See how it attached the file and made a comment all in one fell swoop?

Attachment Comment in Acrobat

13.  Now you can delete the yellow sticky note comment in the Comments List.


12. Be sure to tell your printer about the 11x17 foldout page and let him know that the page location is referenced in the Comments List, and the 11x17 file to print is in the attachments pane.