Tiny Black Square
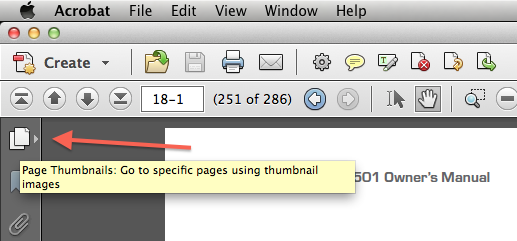
The black square in the lower right indicates the viewing area. It's sort of like the Navigator panel in Photoshop. In the case of this first image, I am viewing page 18-1.

In the case of this third image, I am viewing page 2-9, and also have page 2-9 selected.

When viewing pages in the Page Thumbnails pane, the location of the little black square will be determined by the zoom percentage.
 |
| Viewing at 100% |
 |
| Viewing at 150% |
 |
| Viewing at 300%… Left |
 |
| Viewing at 300%… Right |
Alternatively, you can also click on the black outline and move it around. Be sure to hover directly over the black outline before you click. You'll know when you are hovering over the correct spot when the black arrow turns into a hand.
Blue Highlights
The blue highlighted background indicates which page/s you have selected in the Page Thumbnails Pane. By click and shift + clicking on a range of pages, you will select multiple pages. The page with the darker blue background is the first page you have selected (first click). The page with the darker blue outline is the last page you have selected (shift + click). If you were to go to File > Print, these are the pages that would print.
In this next image, I clicked first on page 17-10, and the shift+clicked on page 17-7. The result is that the blue outline and border are reversed from how they appear in the image directly above.

You can print a non-sequential page range by Cmd/Ctrl clicking on each of the page thumbnails. Alternatively, you can select the first page range by Click + Shift Clicking on the first page range, and then Cmd/Ctrl clicking on the remaining page thumbnails.

See how the page range is already filled in at the print dialog box?
