Recently, I noticed a
book on my bookshelf that had some interesting patterns on the front. Today, for some reason, I was struck by the pattern in the lower left. It has such clean geometry, and is so attractive, that I decided to try and create it using
Teacup PatternMaker.
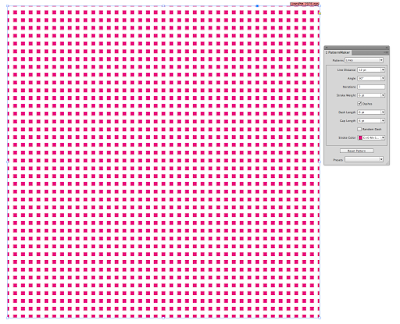
I was able to create it using just four objects: all using the Lines pattern. The first object was the tiny squares. By creating dashed lines that have the same stroke weight, dash length, and gap length, but
double the Line Distance, you get squares!
 |
| First set of squares |
So to get the checkerboard, select the frame, then copy, paste in place, and scoot over a bit. My stroke weight was set to 6 pt, and my cursor key nudge (in Preferences) was set to 1pt, so I just had to nudge it over 6 pts and up 6 points and it lined up to make a perfect little checkerboard.
 |
| Second set of squares |
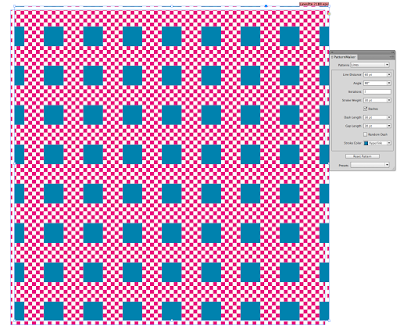
Next, copy and paste in place, changing the color to blue to make it easier to line up. Change the line distance to 60 pt, and the stroke weight, dash length, and gap length to 30 pt. I chose 30 points because I needed a 5x5 set of tiny squares (6 pts each) to fit perfectly inside one of these larger squares.
 |
| Third set of squares |
Now, copy and paste in place again, changing the color to see what you're doing and scooting into place.
Now, change the blue square to pink and the yellow squares to white. Voila!
Checkerboard Gingham!
Like this? Check out some of my related articles:


No comments :
Post a Comment