Friday, September 30, 2011

The British Flag as an InDesign Table

This post is a continuation of my other posts about diagonal lines within tables. Now for those of you who are British, please don't get upset that I didn't get the diagonals quite right. But my goal was to: using a single InDesign table, replicate the British flag as closely as possible.

Technically, the diagonals should line up exactly from one corner of the table to the opposite corner of the table, but InDesign: diagonals run from one corner of the cell to the opposite corner of the same cell. In this case, our table is 2 cells wide by 2 cells high, so the diagonals aren't perfect. But you get the idea.

My mental starting point for this table was a graphic containing geometric specifications for the British flag. You can find it here.

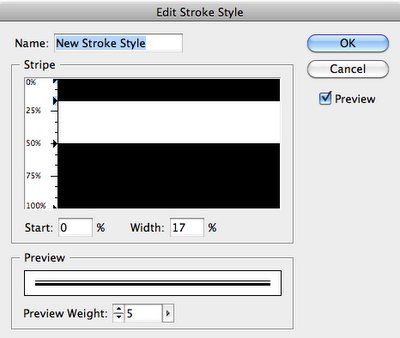
Because the specifications graphic listed proportions for the stripe width, I was able to create custom stripe stroke styles based on those proportions.

First, I made a table; then I filled the table with Blue and then started working on my strokes. I made a three custom stroke styles: one for the horizontal and vertical lines, and two for the diagonals. Then I applied a thick white stroke, set the gap color to Red, and applied my new custom stroke styles.

So, download my sample files, make 2 row by 2 column table, with the cells each 15 points high x 30 points wide. Then apply these cells styles to it. Voila! An almost British flag. 


The stroke style for the horizontal and vertical table strokes (10 pt white stroke with gap color set to Red )


Stroke style for the right-slanting strokes (6 pt white stroke with gap color set to Red)

Stroke style for the left-slanting strokes (6 pt white stroke with gap color set to Red)
If you're puzzled by the logic that InDesign uses to apply stripe stroke style to diagonal lines, well, you're not alone. Check out one of other articles where I have a bit of a writeup about it, as well as some samples of a larger variety of stripe stroke styles applied as diagonal lines. Data-less Tables: InDesign meets Knitting

Thursday, September 29, 2011

The Case of the Possessed InDesign File - Mystery Solved

I recently encountered a problematic file that locked up every time I got to a certain point in my editing tasks. After restarting InDesign a few times, I attempted to go right back to where I left off, only to have the  program lock up again. Here are the things I attempted before I was able to pinpoint the problem:
  • Restarted InDesign
  • Deleted preferences
  • Deleted my InDesign recovery files
  • Restarted my computer
  • Tried editing the file from a different machine
Then I tried editing another section of the file (a different page), and all was fine... until I went back to that troublesome editing spot, which, in this case, was a table. Every time I touched the right-hand border of the table, InDesign locked up. I found that I could edit the text, and pretty much anywhere else in the file, just not the right hand border. So I decided to get rid of the table.


But I didn't really want to retype the whole thing, so I converted the table to text, then converted the text back to a table. And now I was able to move the right border without my program freezing.

For instructions on how to delete your InDesign Recovery files, see Anne Marie's instructions at the bottom of one of my other posts: "InDesign Crashing and Making Me Crazy.

10-8-11 Edit: After thinking on this for a few days, I suspect the problem may have to do with Keep options. I had all the cells in my table set to "Keep with next row," but I also had a few paragraphs to "Keep with the next 1 line." I think there may have been a conflict between the two, and when I tried to make move the right-hand border of the table, InDesign just didn't know what to do, and so it froze up.


The next time this happened (and I'm confident that it will), I will closely inspect the keep options and  document my findings here.